Alarm Status - General Filtering
Filtering Properties
There are several different filtering properties on the Alarm Status Table component. Once you drag the Alarm Status Table component on to a window, by default it shows you all the alarms that are currently 'Active and Unacknowledged,' 'Active and Acknowledged,' and 'Cleared and Unacknowledged' with any priority.
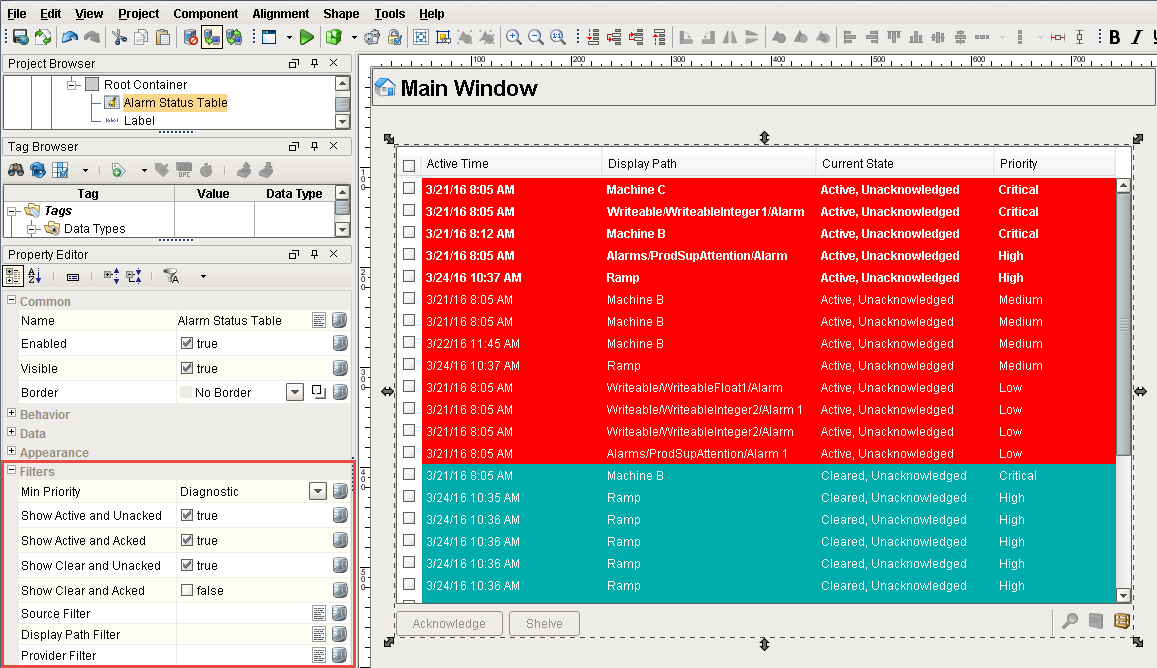
You can filter the alarm list in the table to be a shorter list using the filter properties in the Property Editor instead of scrolling through every single alarm in your system, In the Property Editor, there is a group called Filters that you can configure to focus on only those alarms you want to see. You can filter on Priority, State, Source Path, Display Path, and Tag Provider.
Filtering on Priority
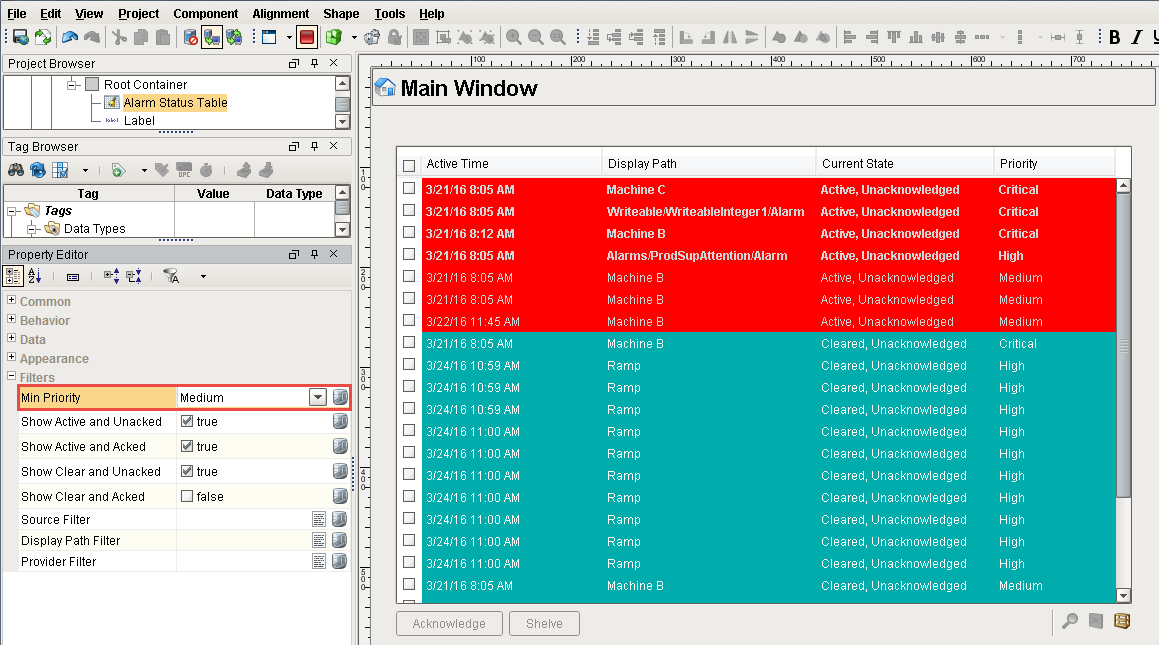
This example shows how you can filter alarms based on Priority. From the Min Priority field, select ‘Medium’ from the dropdown list. You will then see only the Medium priority and higher alarms displayed which creates a smaller list of alarms for an operator to view.
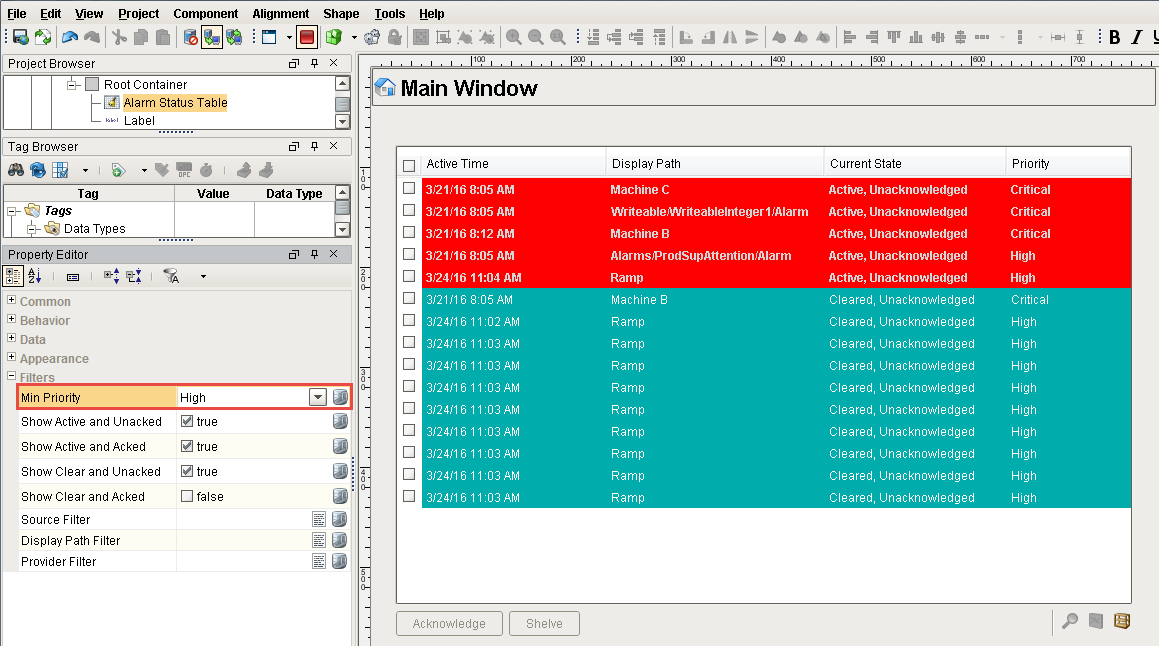
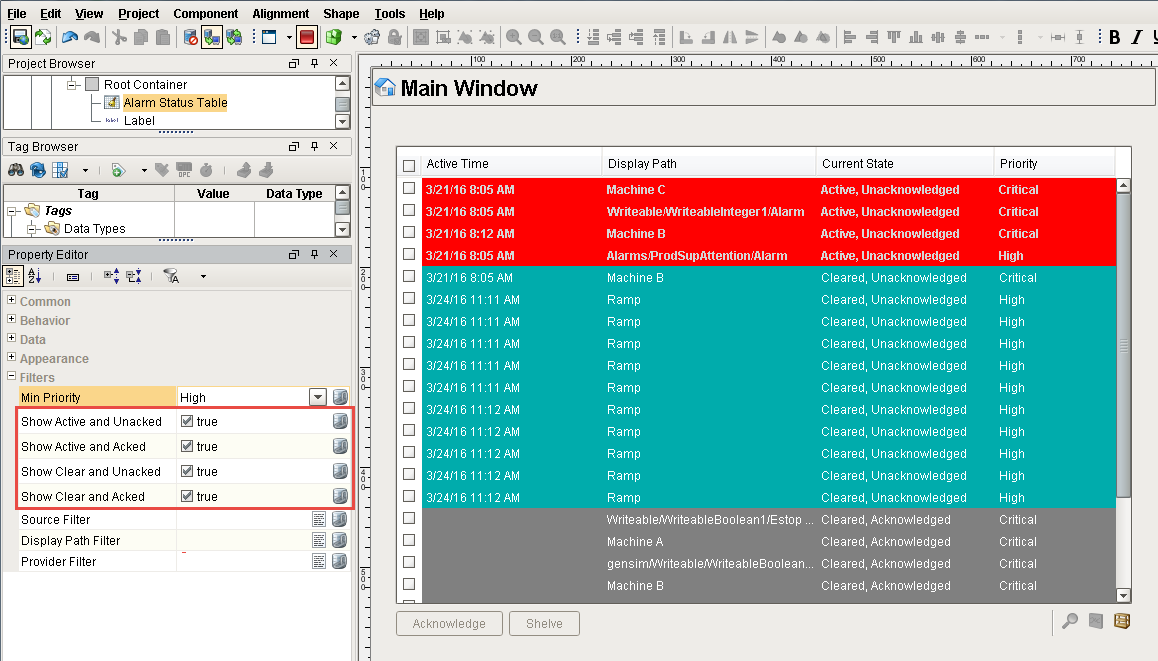
In this next example, select ‘High’ from the dropdown list in the Min Priority field. Now, you will see all High and Critical priority alarms in the system which gives the operator an even smaller list of alarms to view.
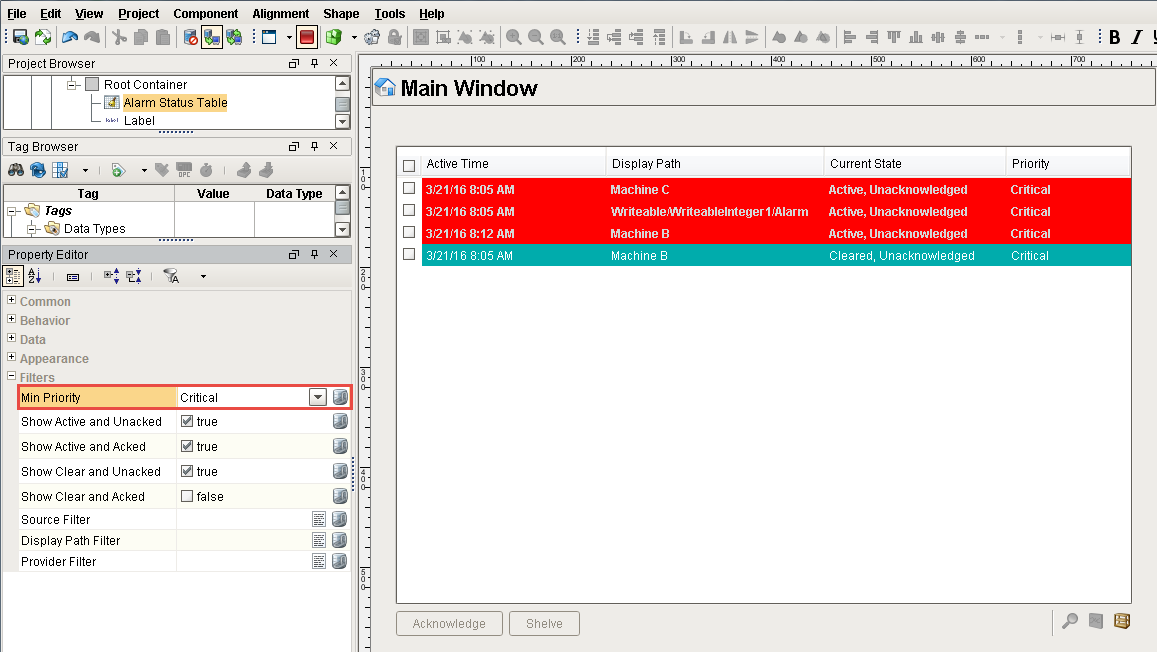
Lastly, select ‘Critical’ from the dropdown list. Notice how the alarm list keeps getting shorter by using the Priority filter.
Filtering on Alarm State
The second set of filters is based on State. There are 4 states an alarm can be in; Active and Unacknowledged, Active and Acknowledged, Clear and Unacknowledged, and Clear and Acknowledged. Each alarm has a different color representing one of the four States.
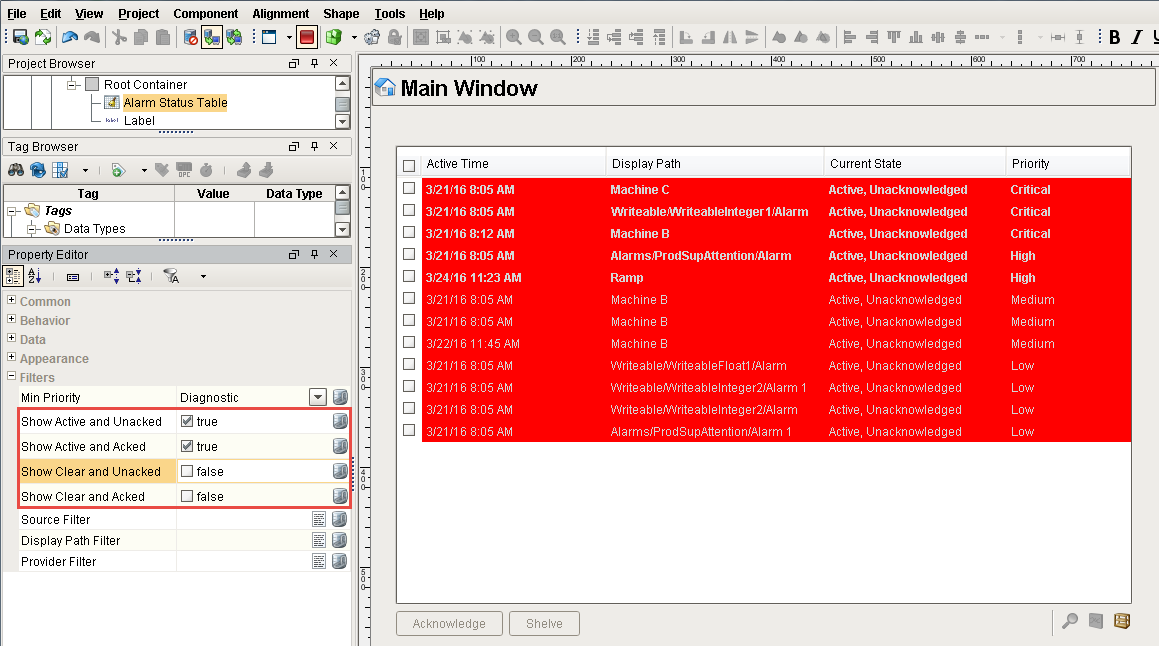
Let’s make our alarm list smaller by unchecking both the Clear filters. This will eliminate all the Clear alarms from the Alarm Status Table and only show the Active alarms whether they are Acknowledged or Unacknowledged.
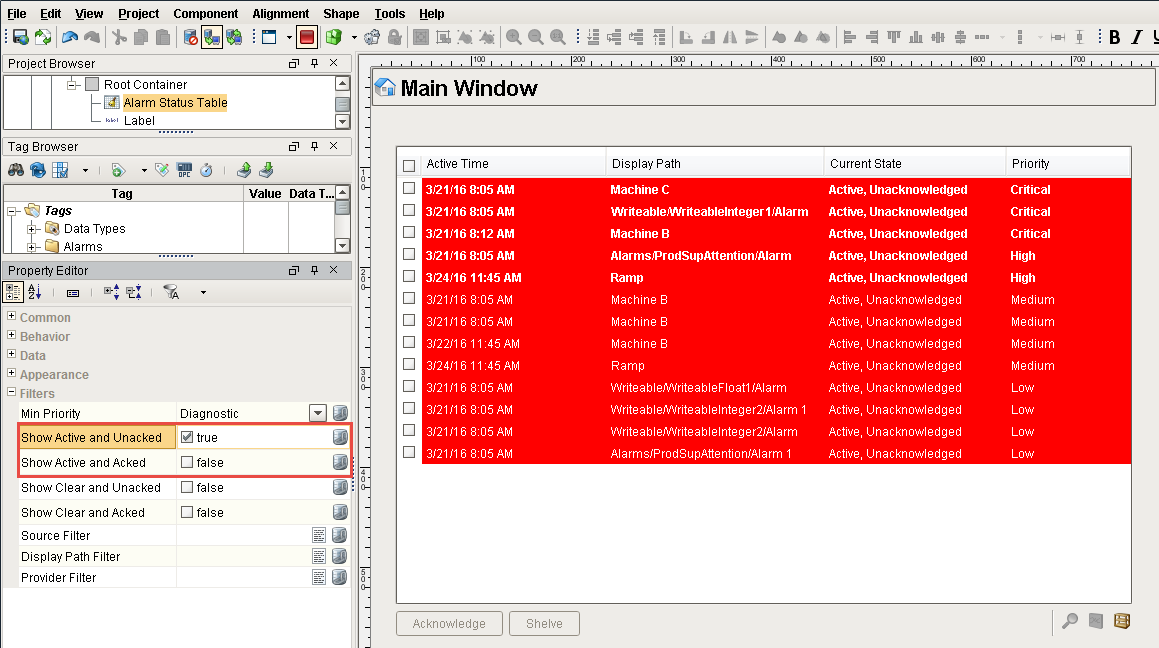
If you uncheck Active and Acknowledged, this will only show the alarms in the Alarm Status Table that are currently Active and are not Acknowledged. A good business practice is to show only the Active alarms that are either Unacknowledged or Acknowledged. It also reduces the number of alarms an operator has to scroll through.
Filtering on Source Path and Display Path
Ignition also has the capability to filter alarms based on the Source or Tag Path and the Display Path.
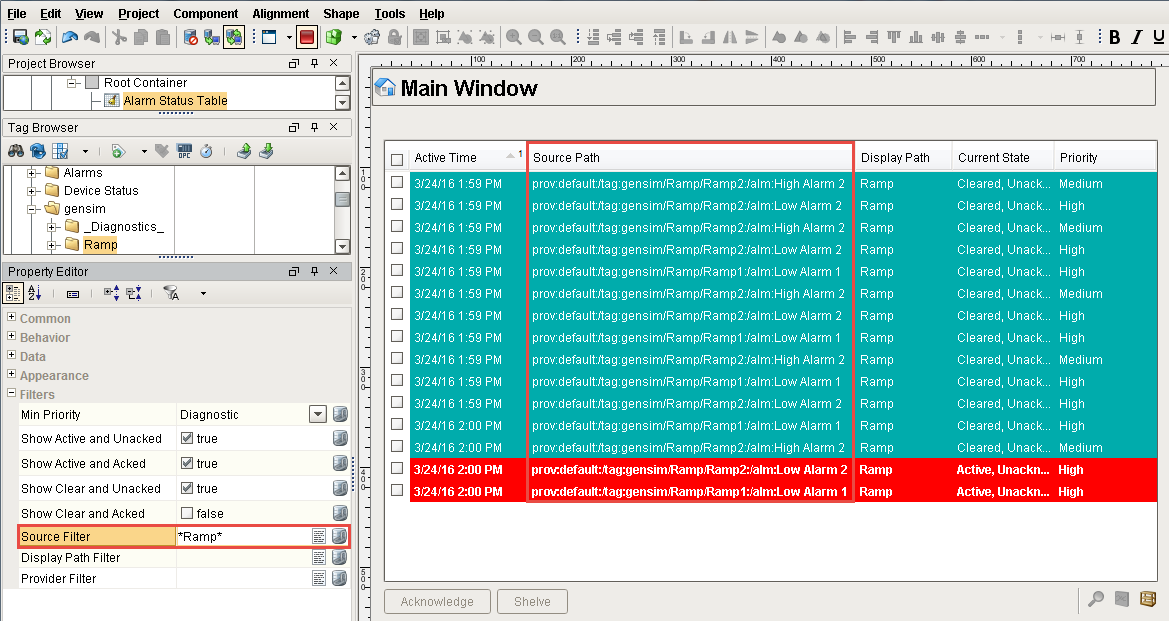
The Source is the actual Tag path which means you can also use Tag folders in Ignition to filter for specific alarms. For example, you may want to filter for all Ramp alarms in the ‘Ramp’ folder. Enter *Ramp* (using * as a wildcard) to look for all alarms with the Ramp Tag Path. You can see in this example, all the alarms have 'Ramp' in the Source Path.
Essentially, you can do the same thing using the Display Path. In this example, ‘High Alarm’ is the name that was setup in the Alarm Configuration, and the Display Path is set to the name you want the operator to see. So for example, the Alarm Status Table shows all the High Alarms.
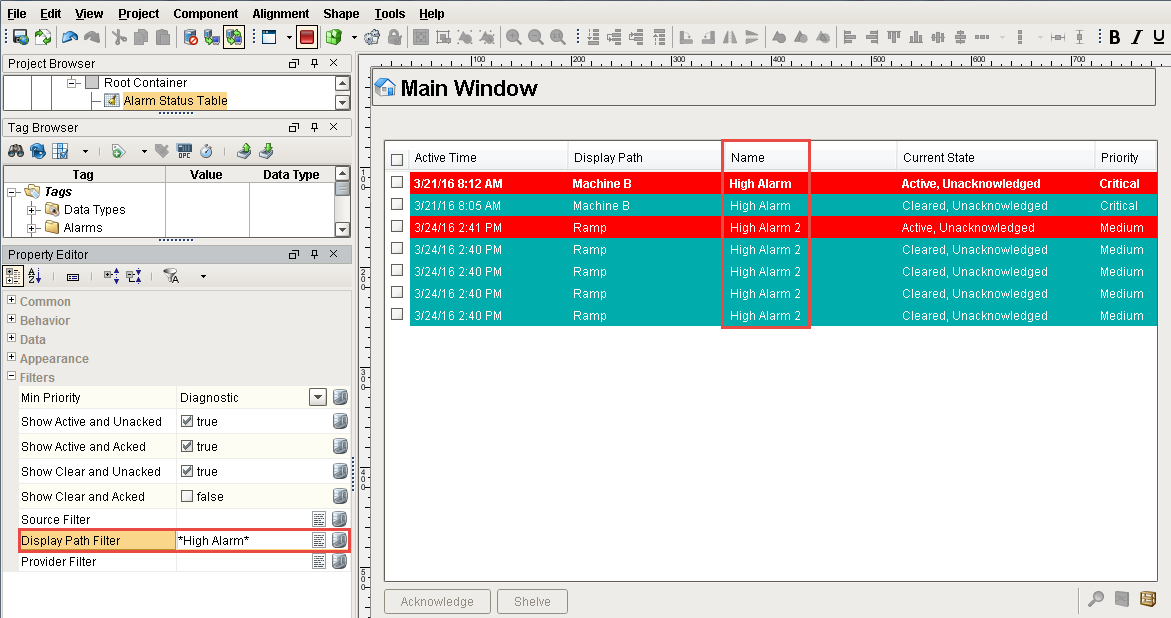
So, it's really easy to do some basic filtering using the alarm filter properties on the Alarm Status Table component.
Similar Topics ...