Labels
Labels  can be used to print out mailing labels, create name tags, or any other generic labels. You can use standard Avery label sheets or specify your own dimensions.
Usage
The Labels component is created by selecting it and dragging it onto the Page of the Report Designer. The size of the labels component is automatically calculated based on the number and size of the labels. The label size and spacing can be set in the Configuration panel when the Labels component is the selected item. To edit the label itself, super-select the template label (always the top-left label in the component) and add text, shapes, data keys or keychain expressions, Images or Barcodes. Keep in mind that any data keys or expressions within the Label component are driven by the Data Key configured in the component (see example below).
|
Configuration Items |
Function |
|
Data Key |
Name of DataSet that will populate the labels |
|
Label Formatting |
Choose from a list of Avery Label Formats, or create a custom sized label. |
|
Rows/Columns |
Defines the number of rows and columns on the page |
|
Label Width/Height |
Width and height of labels in pixels |
|
Spacing Width/Height |
Distance between labels on the page in pixels |
Example
Hypothetical Use Case
We are going to create a new set of custom labels for our University Research Lab to better track the DNA Primers we use in experiments. Primers are expensive and our researchers are getting Carpal Tunnel from the extra Grant Proposals they have to write to fund replacement of Primers that Student Interns keep losing. We have invested in a QR Code Scanner that we will use to help track the Primers. We want the labels to contain info about the Primer and where they belong. In addition, we want the barcode to contain the name, number of the lab, and the location within the lab that the samples below.
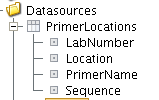
Our Datasource for this information lives in an SQL Table (or maybe an Excel CSV export used as a Static CSV Datasource) which has this structure:
Here are the steps we take to create our labels.
-
Create a Labels component from the Report Design Palette by dragging the Labels item onto your Report.
-
Specify the Data Key that maps to the Data Source you want to drive the label
-
Choose the Appropriate Label Size (or create your own)
-
Create the template for your labels in the Label Component's driving Box
-
Verify Label layout using the Report Preview
Here is how our finished Layout looks:
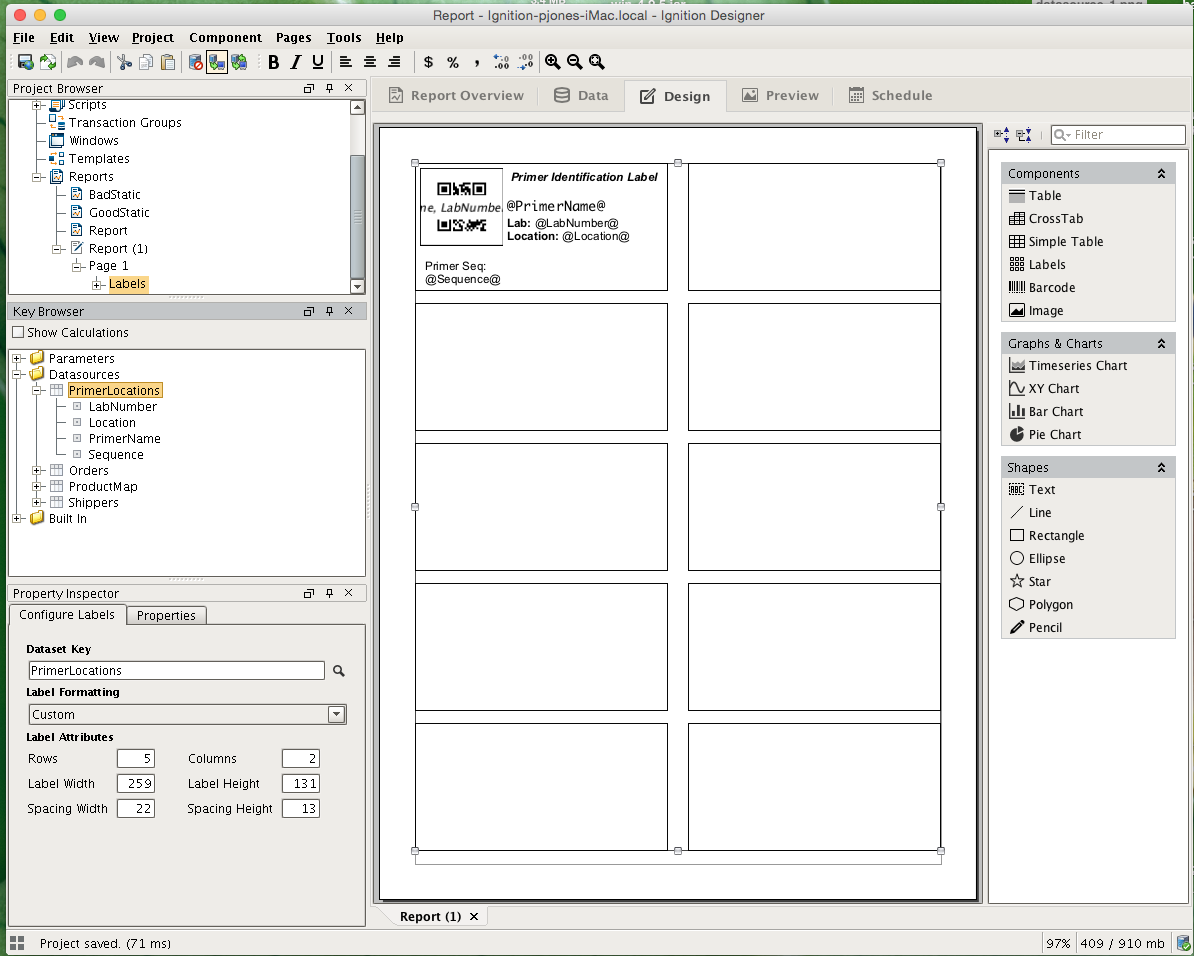
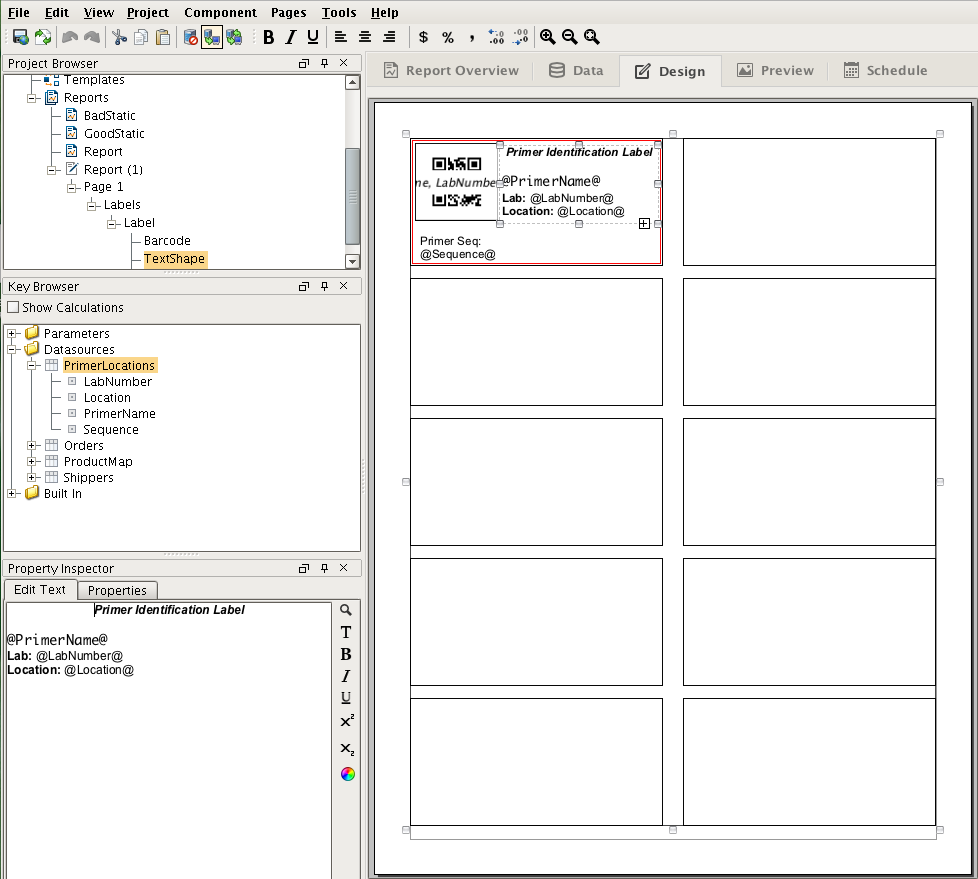
We used a Barcode embedded into the template label to create our QR Codes. Since the labels will be driven by the PrimerLocations Data Key, we can reference the child keys within the components or keychain expressions located within the label. In this case, we formatted the string we want the barcode to encode by adding "PrimerName, LabNumber, Location" to the Data Key field of the barcode. To make the label human readable, we added some text shapes via selecting the shape and dragging within the super-selected template label as can be seen in the next image. We mix plain text and data keys by using our @ symbols to surround things we want to resolve to data when the report is generated.
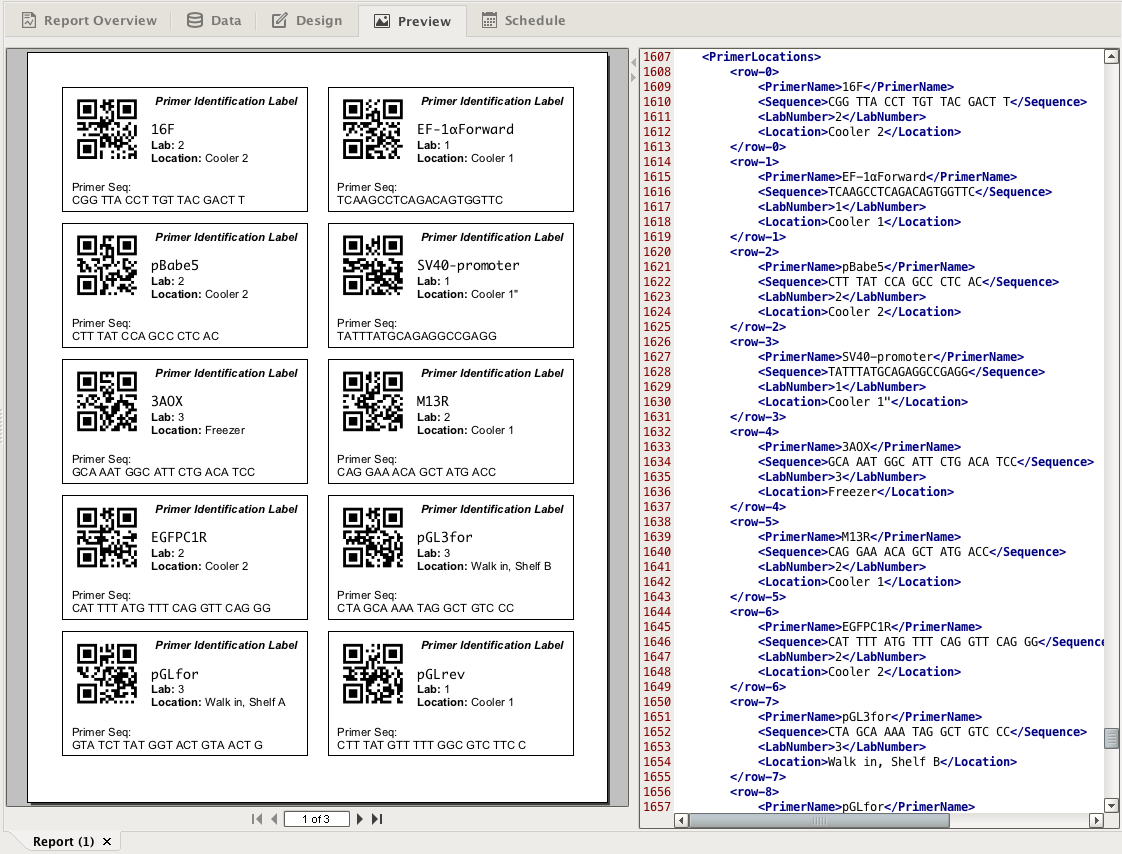
When we are happy with our design, we can switch to the Preview to take a look at the result.
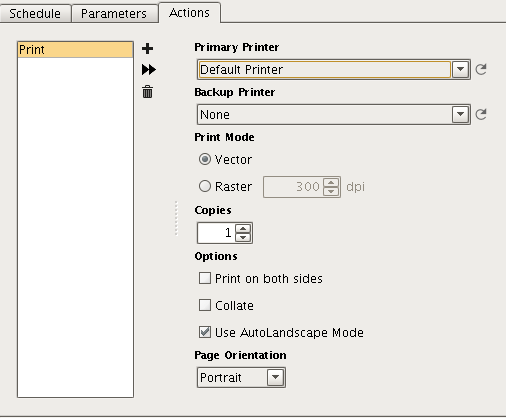
Finally, we can print our labels by creating a Print Action on the Schedule tab, and running it by clicking the "Run Immediately"  button. If we know we get new shipments of Primers on a set schedule, we could have these labels print automatically. In this case, we want to simply print on demand, so we disabled the schedule on the Schedule tab before setting up our printer.
This completes this example. Feel free to comment if you have questions or recommendations!