Quick Start Guide
Quick Start Guide
Are you new to Ignition? Here are a few simple steps to get going right away! In very little time, you can get a sample project up and running.
To get started with Ignition, it helps to have a general idea about the major steps involved in designing your SCADA/HMI projects. Although there are many creative and innovative ways of using Ignition to do almost anything you want, most users will go through the following steps.
1. Download and Install Ignition
Installation is simple and can be done in under 3 minutes! Let's get started and install now.
Install Ignition on Windows
-
Java 8+ (server), Java 6+ (client)
-
Dual-Core Processor (32 or 64 bit)
-
4GB RAM
-
10GB free HD space
Also, ensure you have Administrator privileges to run the Ignition installer.
To download and install Ignition on Windows
-
Go to the Inductive Automation website at
www.inductiveautomation.com
-
Select Download > Current Release.
-
On the Ignition Downloads page, scroll down to System Installers and select the ignition-X.X.X-windows-x64-installer.exe installer.
If your computer runs on a 32-bit Windows, click the ignition-X.X.X-windows-32-installer.exe installer.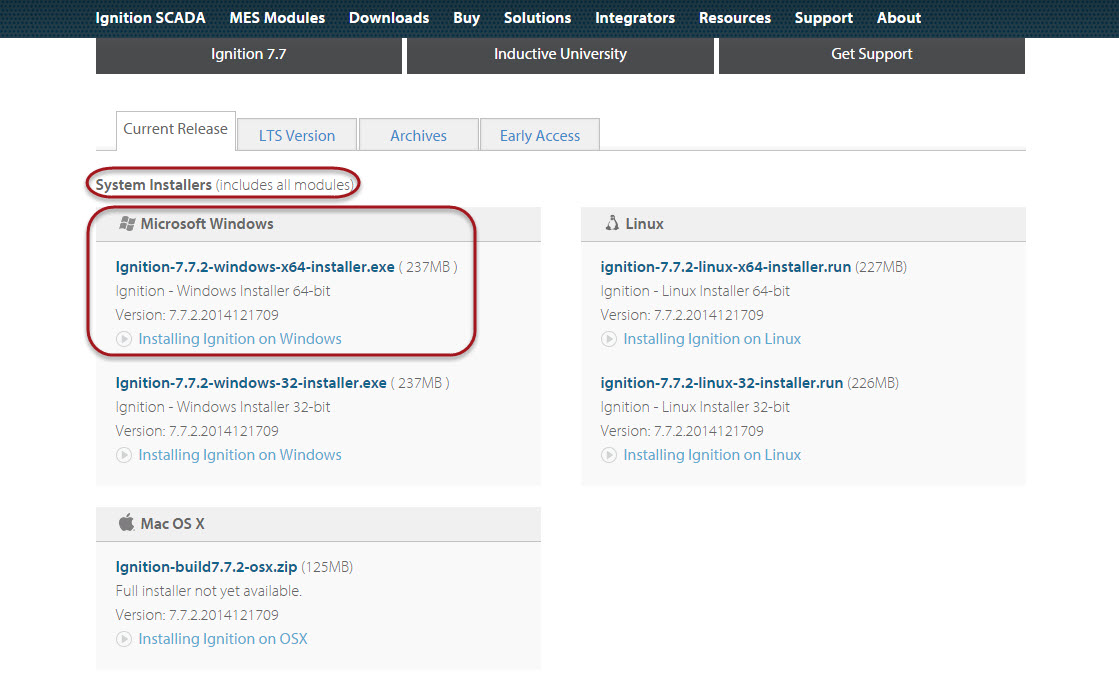
Note: An error window is displayed if you try to install 64-bit Ignition on a 32-bit Windows system. You are allowed to install 32-bit Ignition on a 64-bit system (however, this is not recommended). -
After the installer downloads, click on the .exe executable file to start installation.
The Setup window welcomes you to the Ignition Setup Wizard.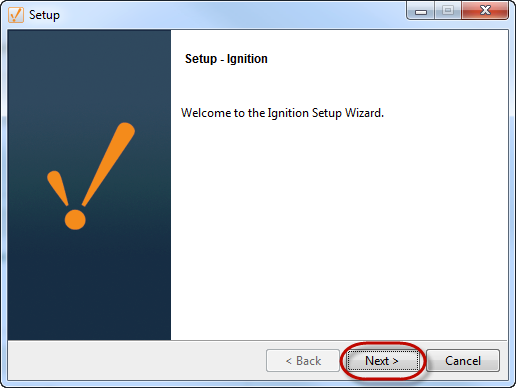
-
Click Next.
-
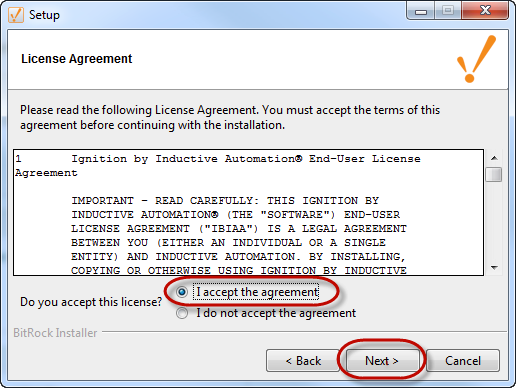
Click the I accept the agreement button and click Next.
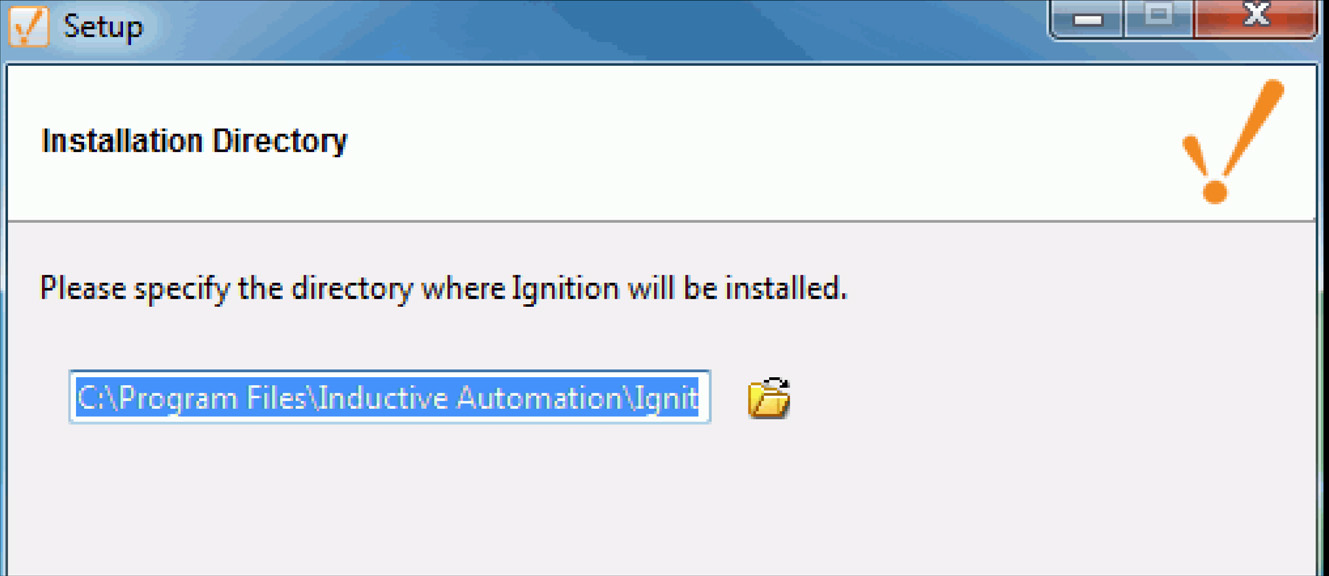
The Installation Directory window is displayed. By default, Ignition is installed under your Program Files directory. This is usually a good choice.
-
Make a note of the default installation directory, Program Files/Inductive Automation/Ignition, accept the default Installation Directory, and click Next.
The Installation Mode window is displayed.
-
Select either the Typical or Custom mode.
The Typical installation includes Ignition with all of the HMI/SCADA modules. The only modules that are not installed by default are the MES modules.
The Custom installation lets you control and individually select the modules that you want installed.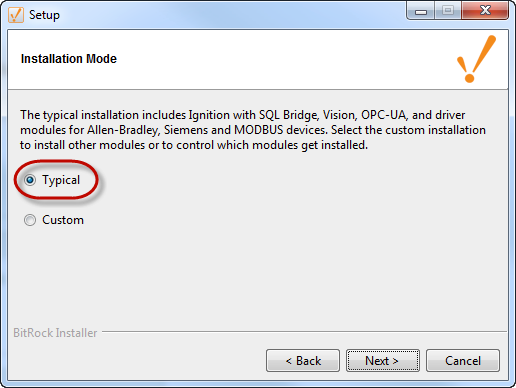
-
Click Next.
The Setup window is displayed.
If you selected Custom mode, in the Setup window you can select the check box next to the modules you want to install as part of the Ignition installation. To see a brief description of the module, click on the module name.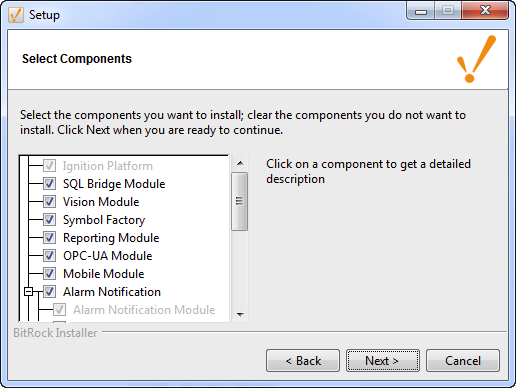
Setup Wizard shows Ignition is now ready to install.
If you decide to change your selections, click Back to go back and make your changes. -
Click Next.
-
After Setup Wizard shows Ignition installation is finished, make sure that the check box for Start Ignition now is selected, then click Finish.
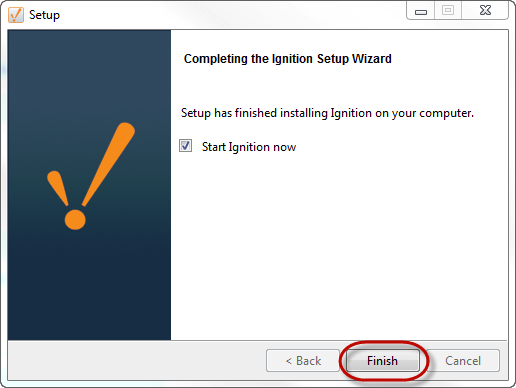
A splash screen informs you that Ignition is starting. This may take a few minutes to finish.

That’s it! Ignition Installation is complete and the Gateway is then launched.
Your web browser opens the Gateway home page at
http: //localhost:8088
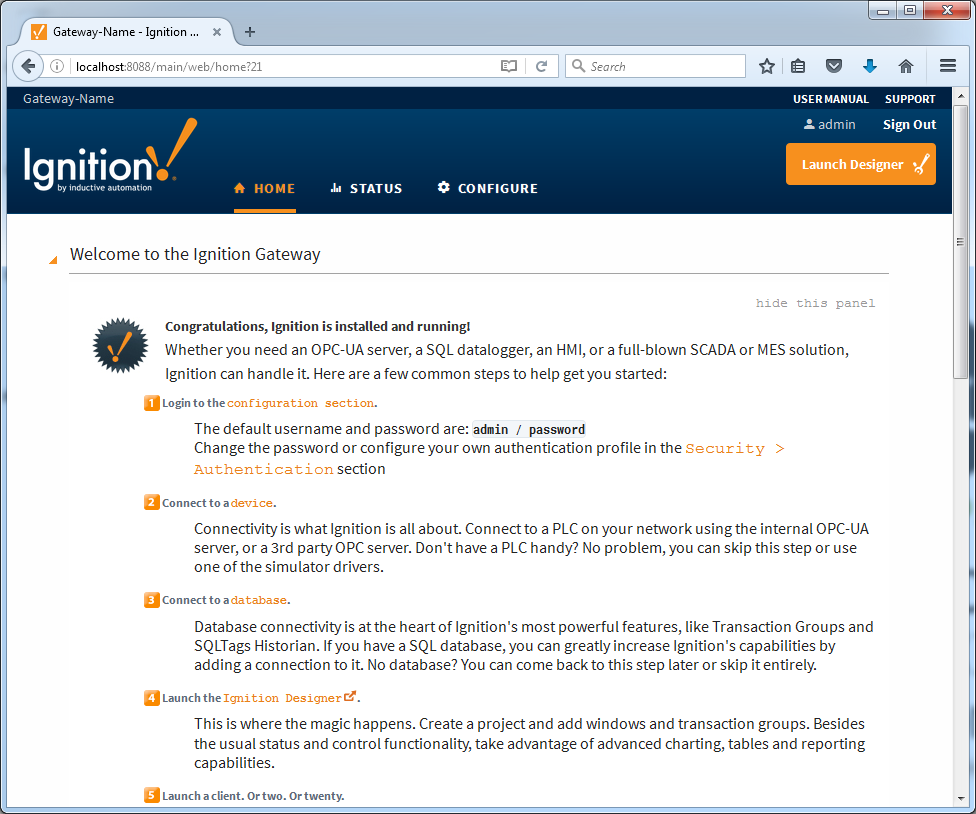
Ignition installs itself as a Window Service (Start > Control Panel > Administrative Tools > Services > Ignition Gateway), so it starts automatically when your computer starts up.
Or Install on Linux or Mac OS X!
2. Launch the Gateway Webpage
The Ignition Gateway is a web server. When it is running, you access it through a web browser in just 2 steps!
Launch the Gateway Webpage
-
Figure out the IP address of the computer you installed Ignition on. If this computer is the one Ignition is installed on, then you can use localhost instead of the IP.
-
Open up a web browser and go to this address: http://ipaddress:8088 and it will bring up the Gateway Homepage. If you are using localhost, it will look like this: http://localhost:8088

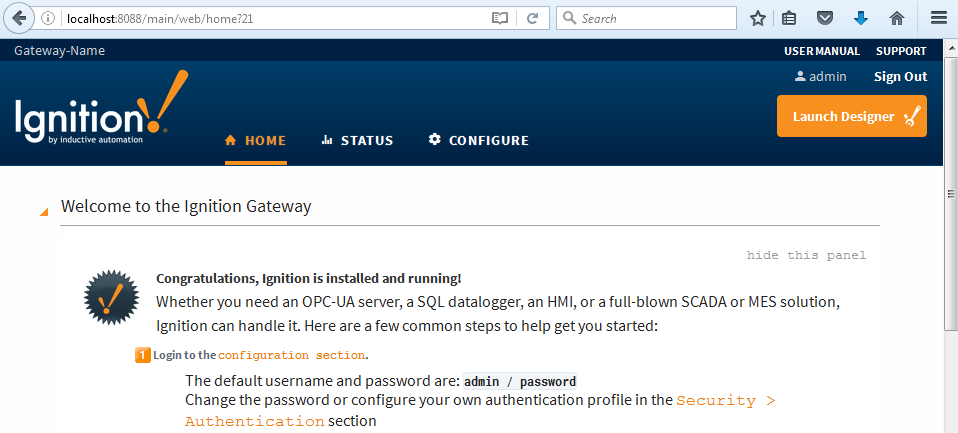
The first time you go to the Gateway Homepage, it shows you 5 common steps to help you get started. You can follow along with these steps and/or with this step-by-step walk through, they follow the same basic workflow. Learn more about the Gateway Webpage here!
3. Connect to a device
Ignition can connect to may different devices natively with the built-in OPC-UA Server.
Connect to the Generic Simulator
-
From the Gateway Webpage, navigate to the Configure section.
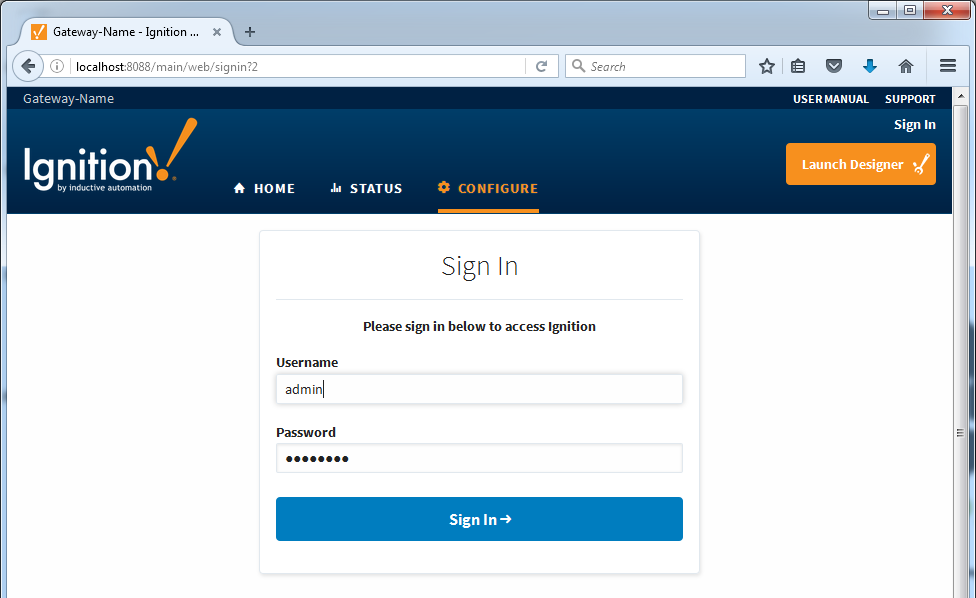
-
Enter the default username and password for the Designer and click Login.
Username: admin
Password: password
-
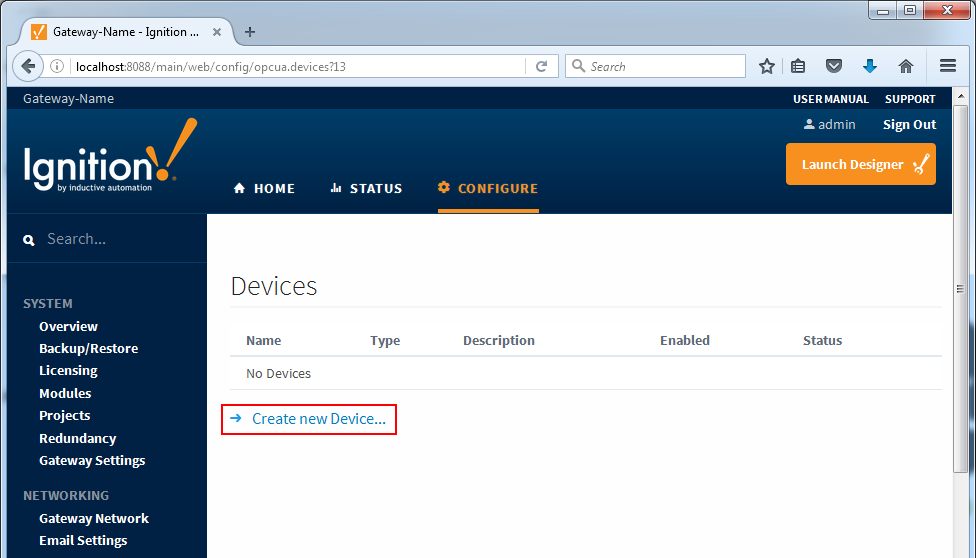
Scroll down to the OPC-UA section on the left and click the Devices link.
-
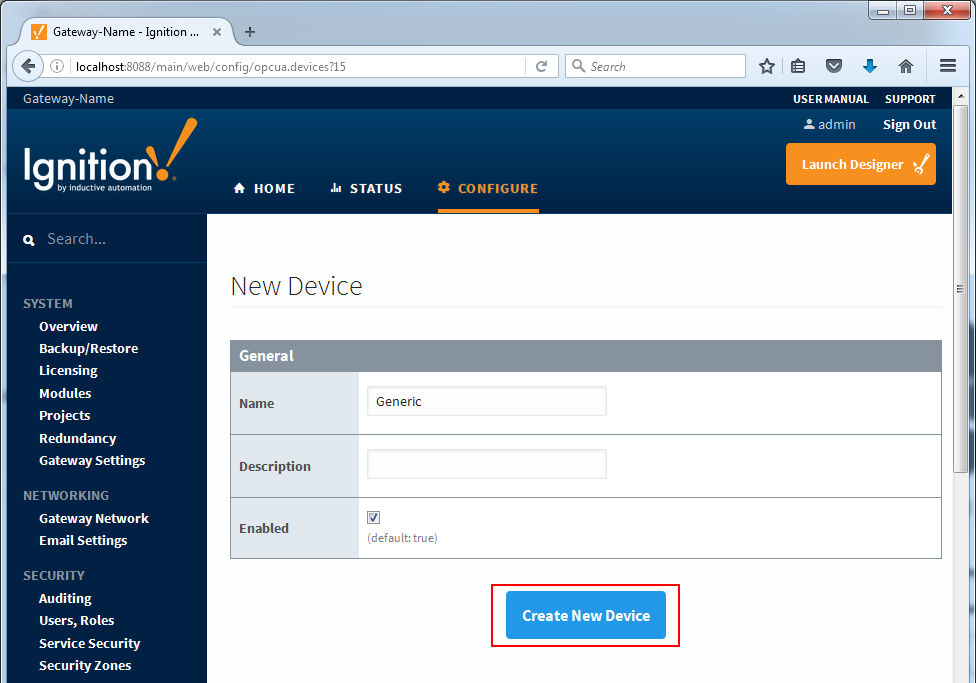
To add a new Device Connection, click the Create new Device... link.
-
Select Simulators Generic Simulator and click Next
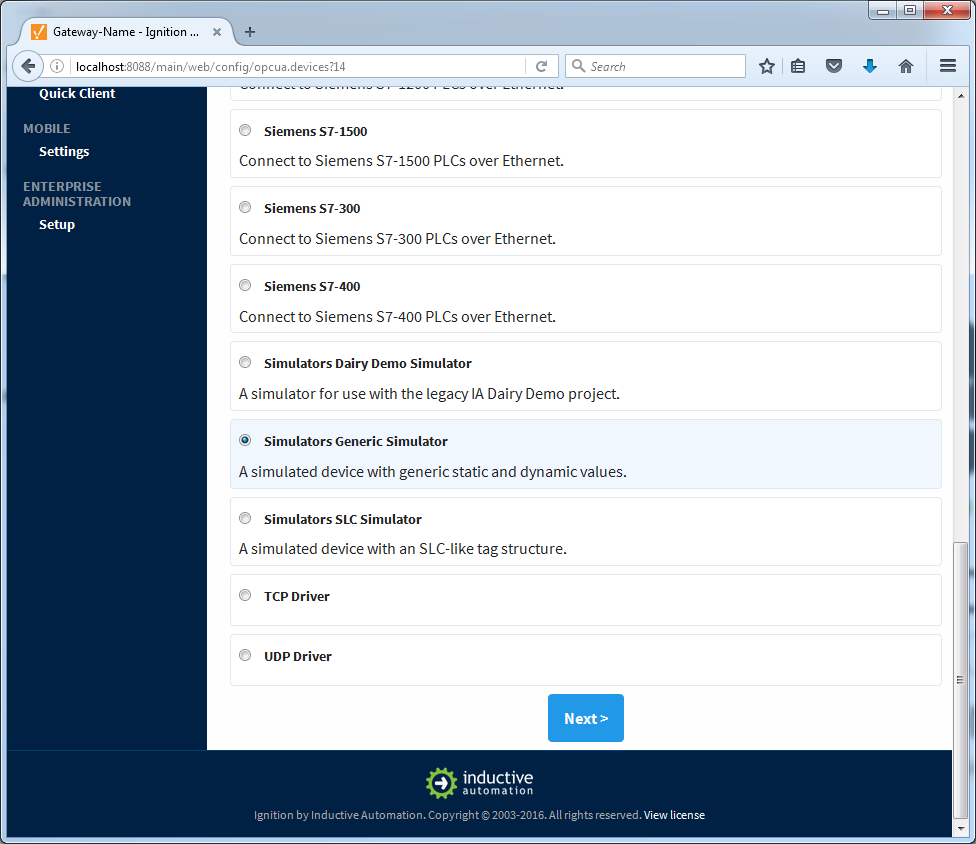
-
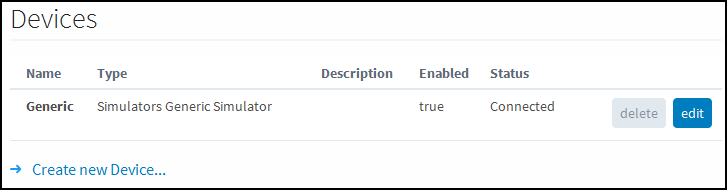
Give the new connection a name and click Create New Device.
Learn more about Devices!
4. Connect to a database
After you install your database, you can connect it to Ignition. To get detailed descriptions for a number of different database connections, see Connecting to Databases. The common steps in connecting to all databases is as follows:
Connect to MySQL
-
Log into the Configure section of the Gateway Webpage just like in the previous sections.
-
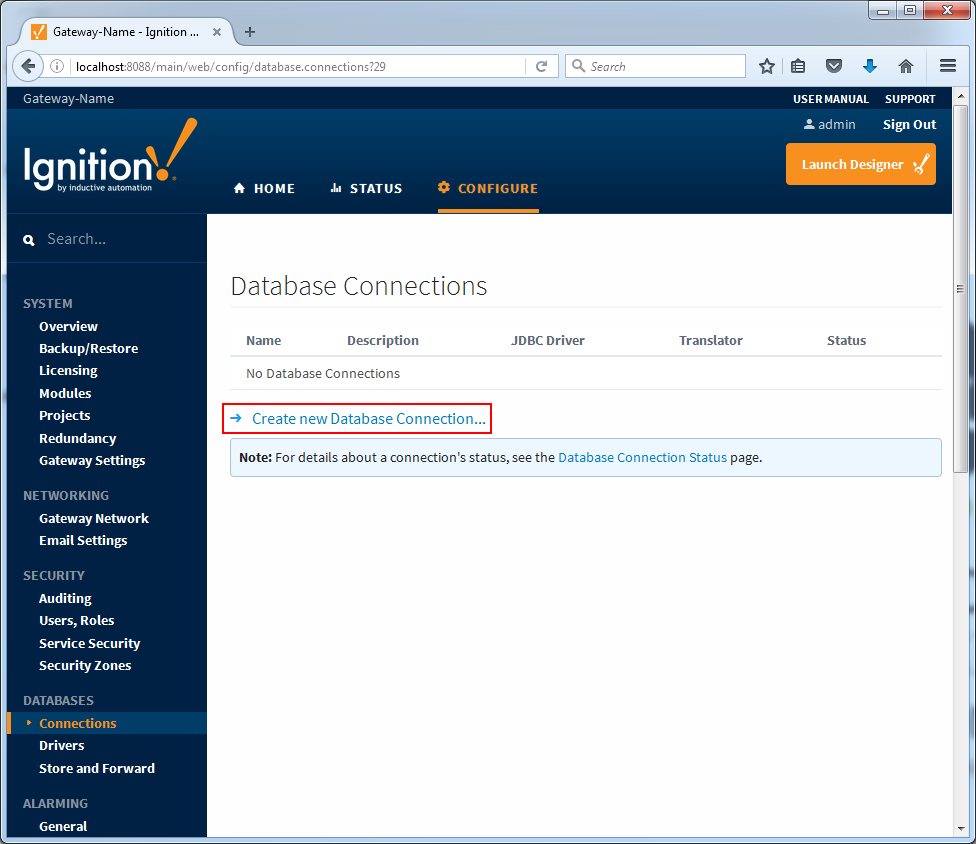
Navigate to the Databases Connections page.
-
Click the Create new Database Connection... link.
-
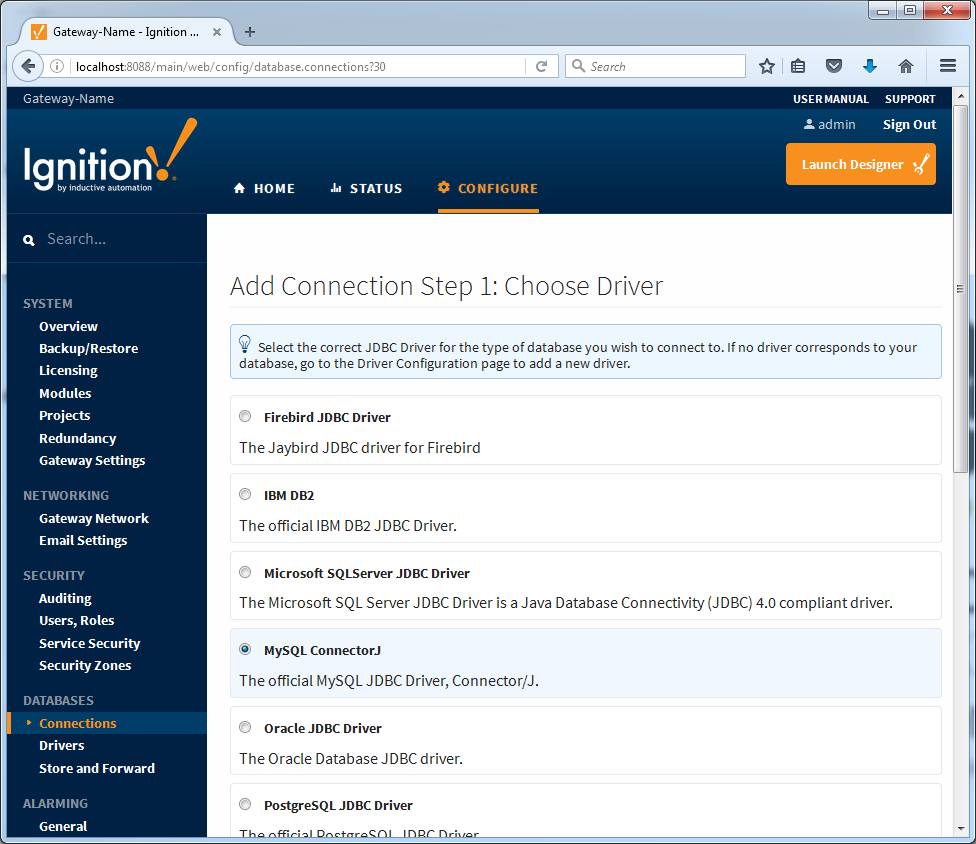
Select the MySQL ConnectorJ option and click the Next > button.
-
Enter a Name, Connect URL, username, and password. If you just installed MySQL on the same machine as Ignition you will be able to use the following credentials:
Name: MySQL
Connect URL: jdbc:mysql://localhost:3306/test
Username: root
Password: [whatever password you entered when installing MySQL]
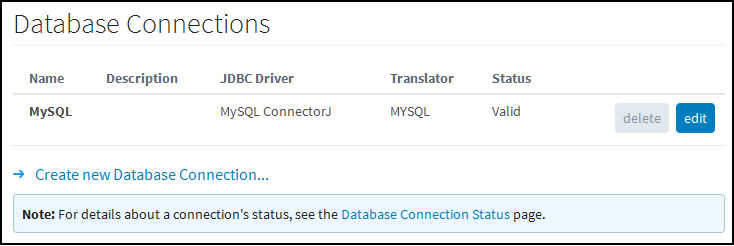
Scroll to the bottom and click the Create new Database Connection button.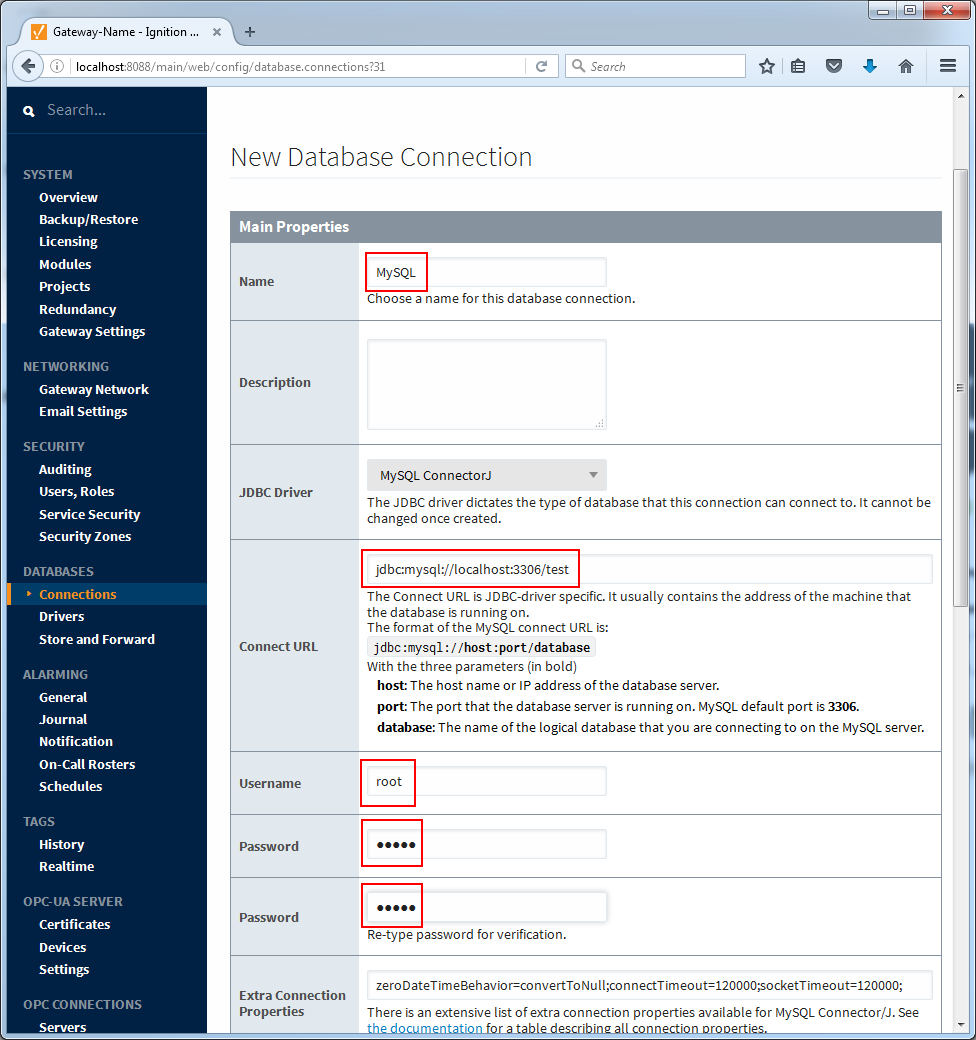
Learn more about Database Connections!
5. Open the designer
Now that we have set up a device and database connection, let's open the Designer and Create a project.
Launch the Designer and Create a Project
-
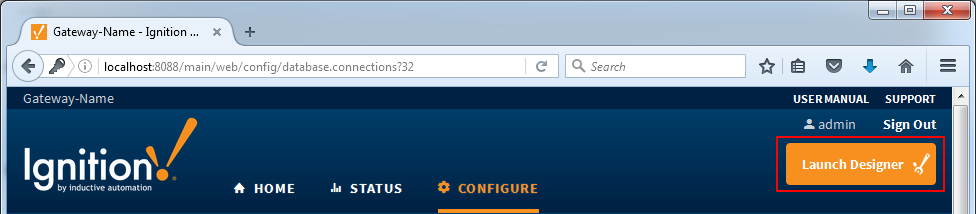
On the Gateway Webpage, click the Launch Designer button in the upper-right of the page.
Depending on your web browser, it may ask you if you want to Keep or Discard a designer.jnlp file. If it does, tell it to keep the file.
If it doesn't start automatically, run the designer.jnlp file to start the Designer.
If you are using Chrome, you can do this by clicking the file in the lower-left of the window or go to your downloads folder and double-click the jnlp file to run it.
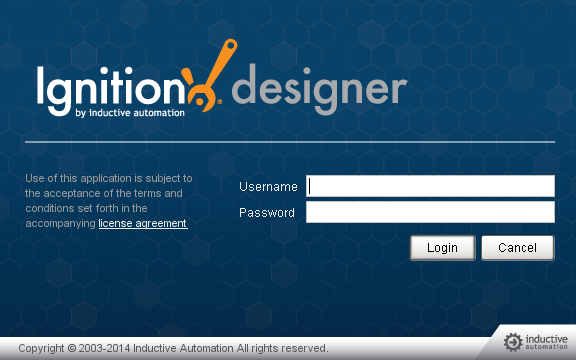
The Designer starts up and the login window is displayed. -
Enter the default username and password for the Designer and click Login. It is the same as for the Gateway Configuration section:
Username: admin
Password: password
Note:
The default Username is set in the Configure section of the Gateway Webpage, under Security > Users, Roles.

-
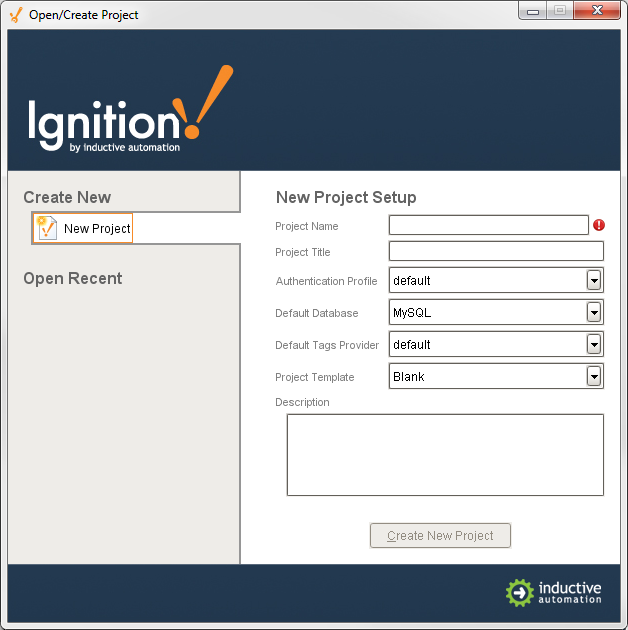
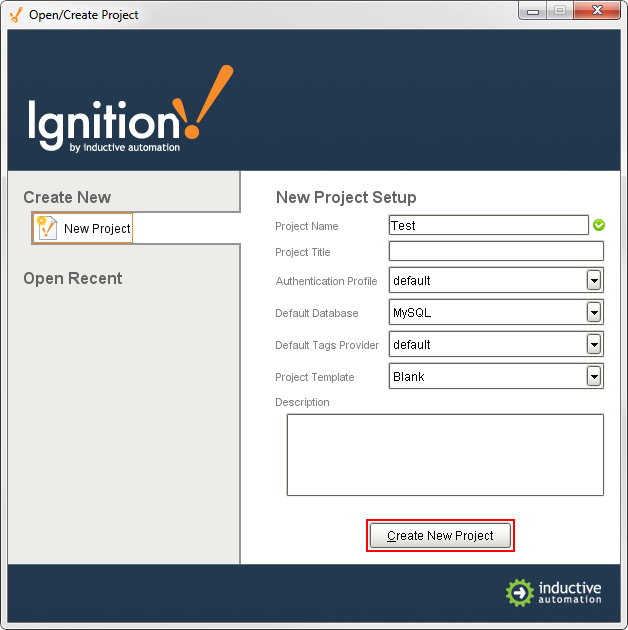
The Open/Create Project window is displayed giving you two options, to create a new project or open an existing one. As we don't have any existing projects yet, we will create a new project.
-
In Project Name, enter a name for your new project (no spaces!).
-
If you created a Database Connection, you will see the Default Database field is already populated. This will be important when we get to storing history.
-
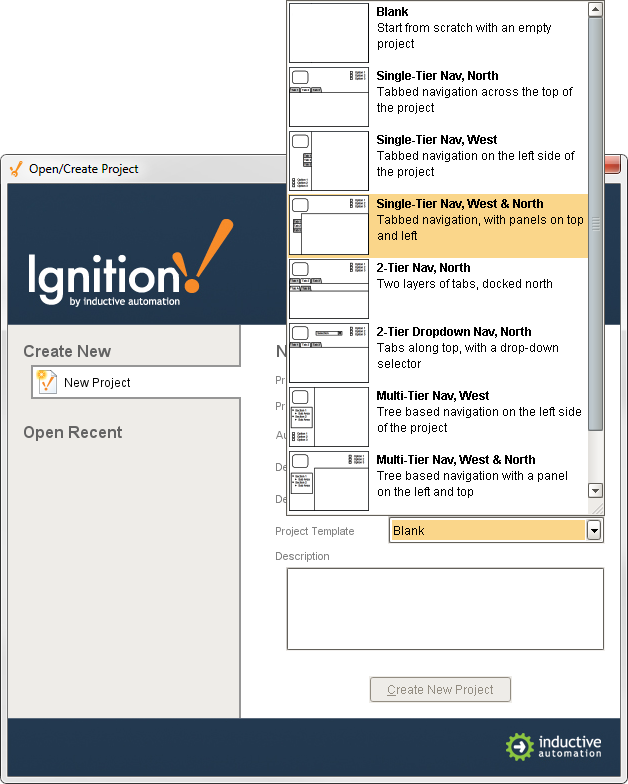
For Project Template, select a template from the drop-down list, for example, you can select the Single-Tier Nav, West & North template.
Rather than starting from a blank project, the templates let you start from one of the eight skeleton projects that already have navigation windows setup. These projects are completely customizable and are designed to help you get started faster.
-
Click on Create New Project.
The Designer will now launch and you can work on your project!
Learn more about the Designer!
6. Create Tags
With the Designer open, a great first step is to create some Tags. You'll use these tags for realtime status and control and to store history with the Tags Historian. You can use Drag and Drop to bring Tags into Ignition with the Designer. Once there, Tags are all configured in the Tag Browser panel.
Click and Drag Tags into the Designer
If you have created a device in the earlier step, the easiest way to create some Tags is by dragging the tags from the OPC Browser.
-
In the Tag Browser, select the Tags folder and click the Browse OPC Servers icon.
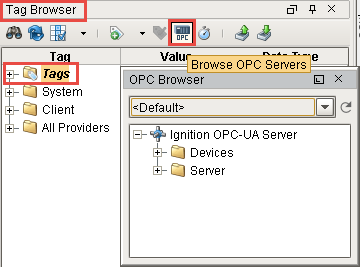
The OPC Browser is displayed and you can browse all of your OPC connections.
By default, you've got a connection to the internal Ignition OPC-UA Server, which has any devices in it that you created earlier. Expand the Devices folder and find some tags that you're interested in. -
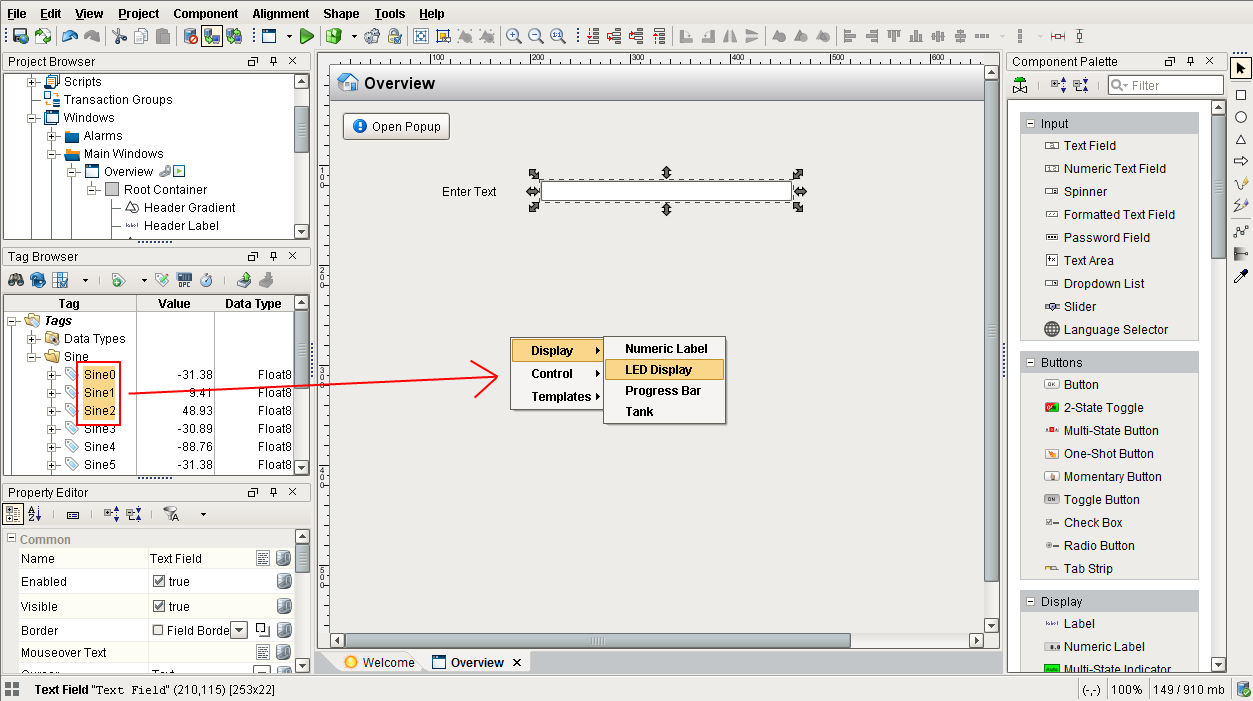
From the OPC Browser, highlight the tags (for example, as in the picture below, folders inside the Sine folder) and drag them to the Tags folder in the Tag Browser.
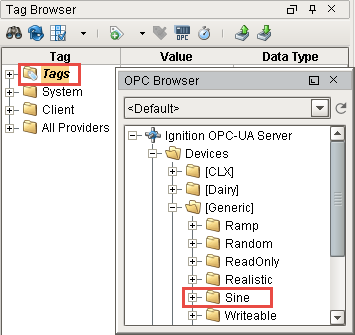
You can drag individual tags or folders. When you drag folders, Ignition keeps the same hierarchy as the PLC. As soon as you drag the tags into Tag Browser, you can see their values being updated in the Tag Browser,
-
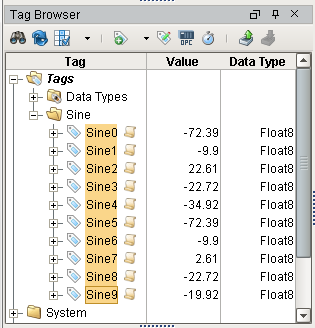
That's it! You now have some Tags. You can see their values come in and start updating automatically. By default, they update at a 1 second rate.
Expand the Tags folder to see their live values.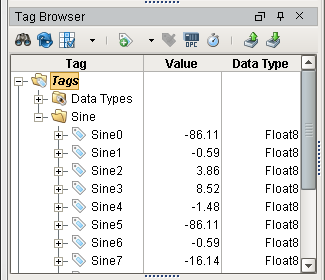
Learn more about Tags!
7. Add Components to a Window
You can drag and drop components onto your project windows, and bind them to each other, to Tags, or to values in the database. Let's create a few components and show live values in the Client.
Add Components to Your Project
-
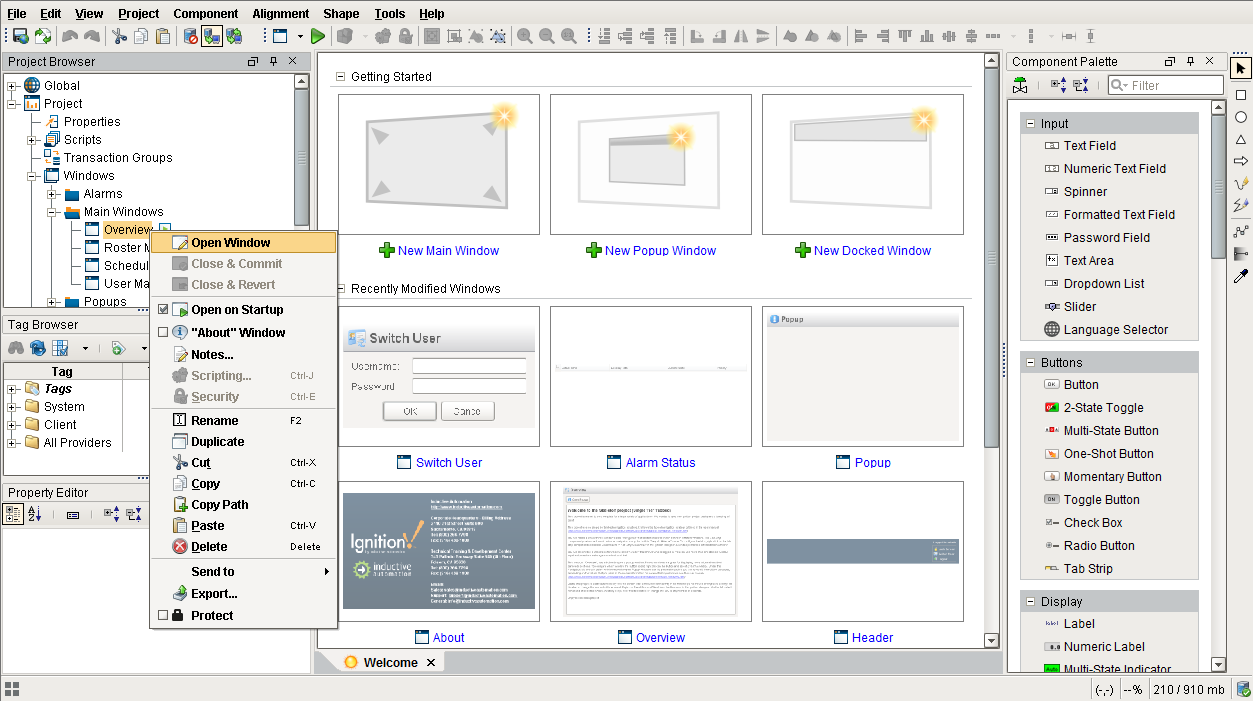
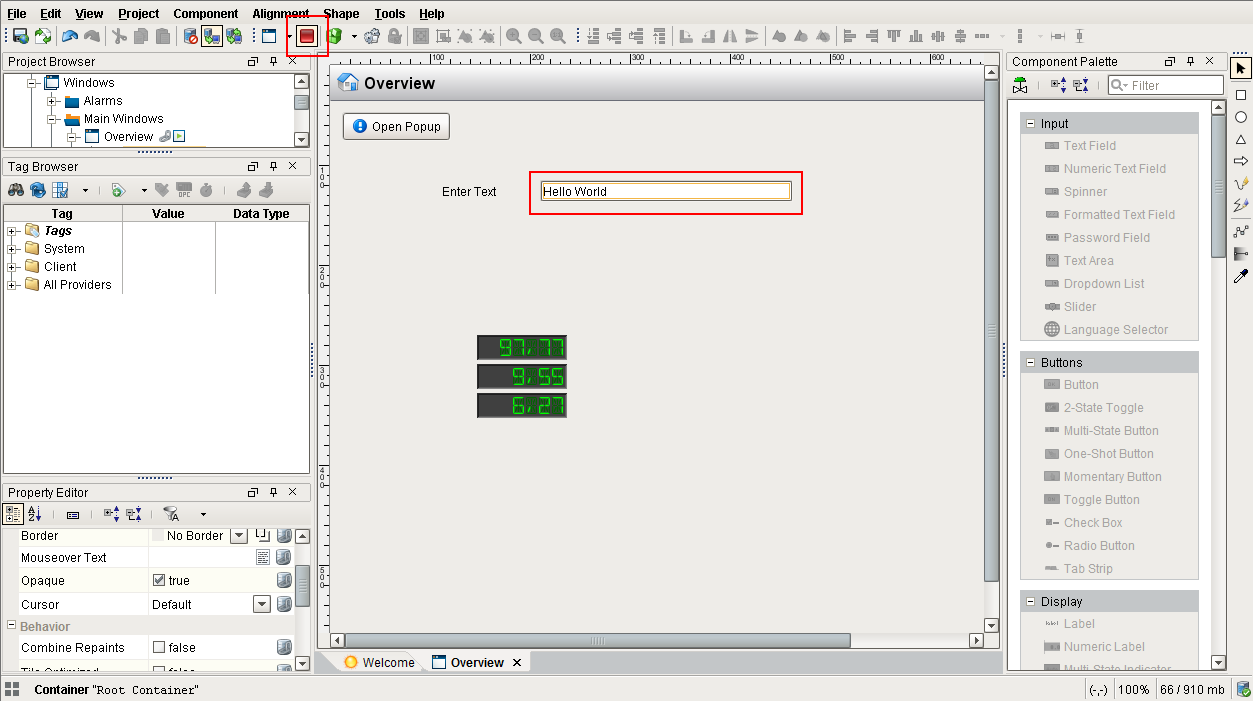
From the Designer, go to the Project Browser and open the Overview window.
-
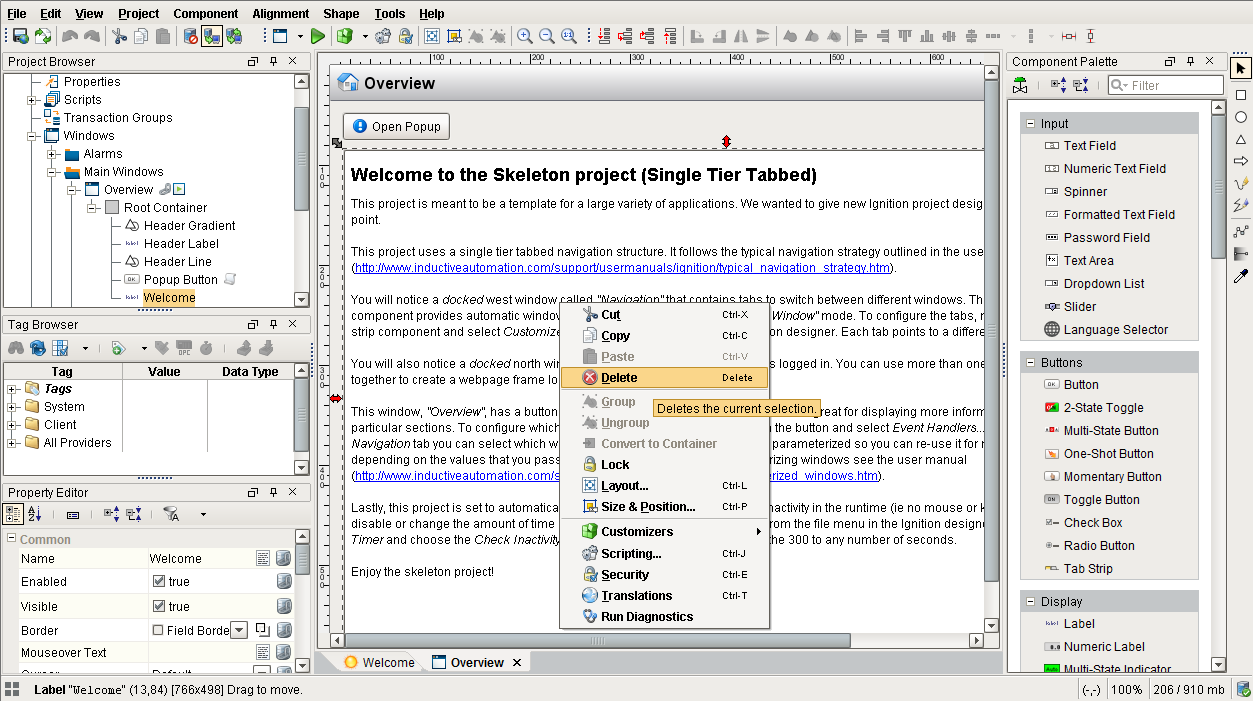
You can see there are already components on the window, let's make a little space. Select the large Label and delete it.
-
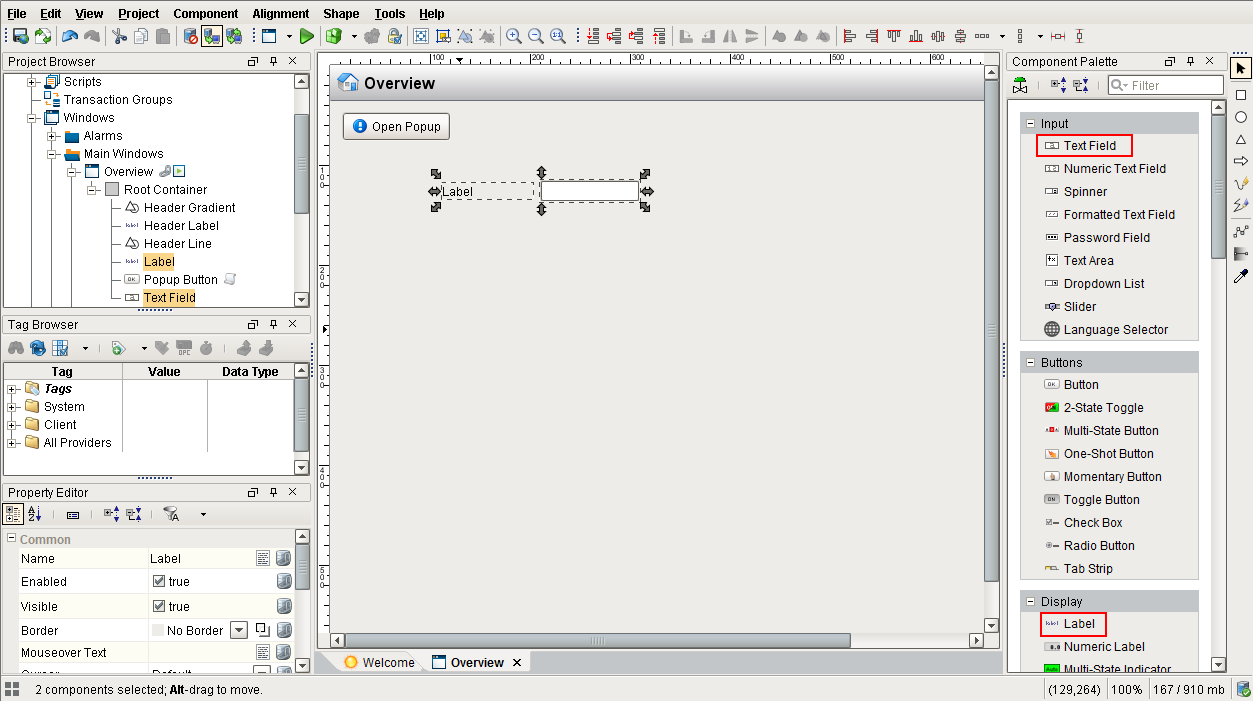
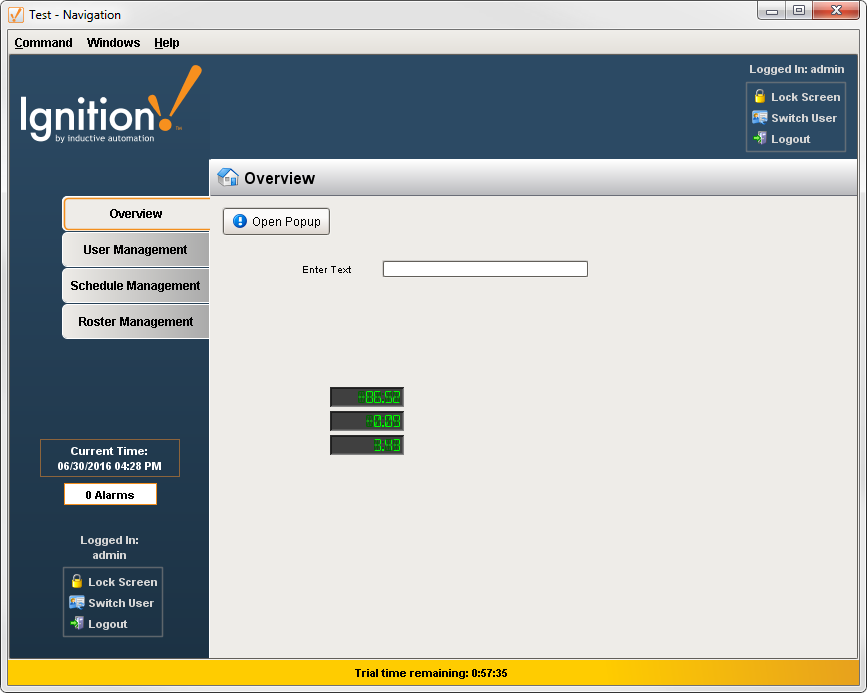
Now we have some space to work with. You can start by clicking and dragging components from the Component Palette on the right onto the window. Let's add a Text Field and a Label component. Users can type in the text field.
-
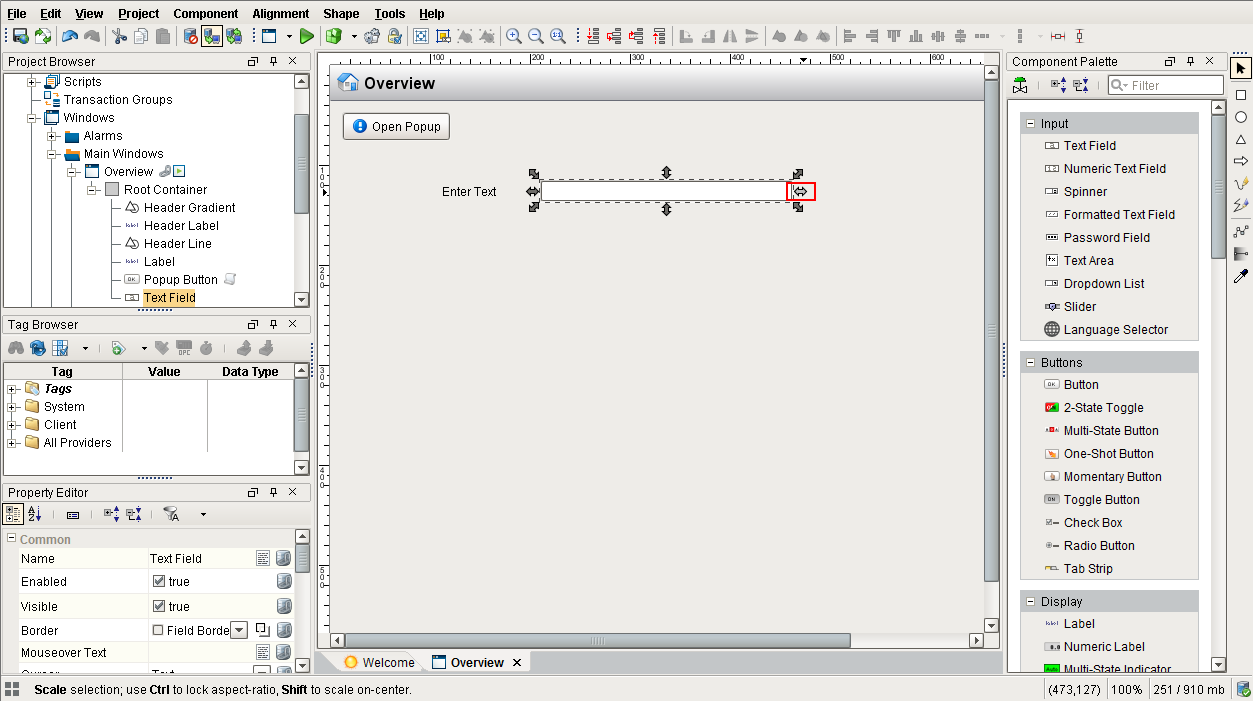
Double-click on the Label component to type directly into it, I've renamed mine to say "Enter Text." You can also select a component and click-and-drag the arrow handles to resize them.
-
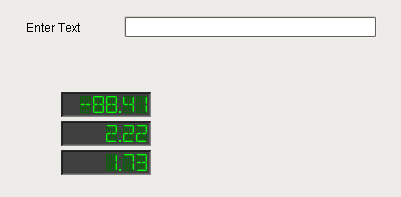
Now let's add some tag values to the window. The simplest way is to go into the Tag Browser and drill down to the tag(s) you want and drag them onto the window. Select a few Tags and drag them into the window.
-
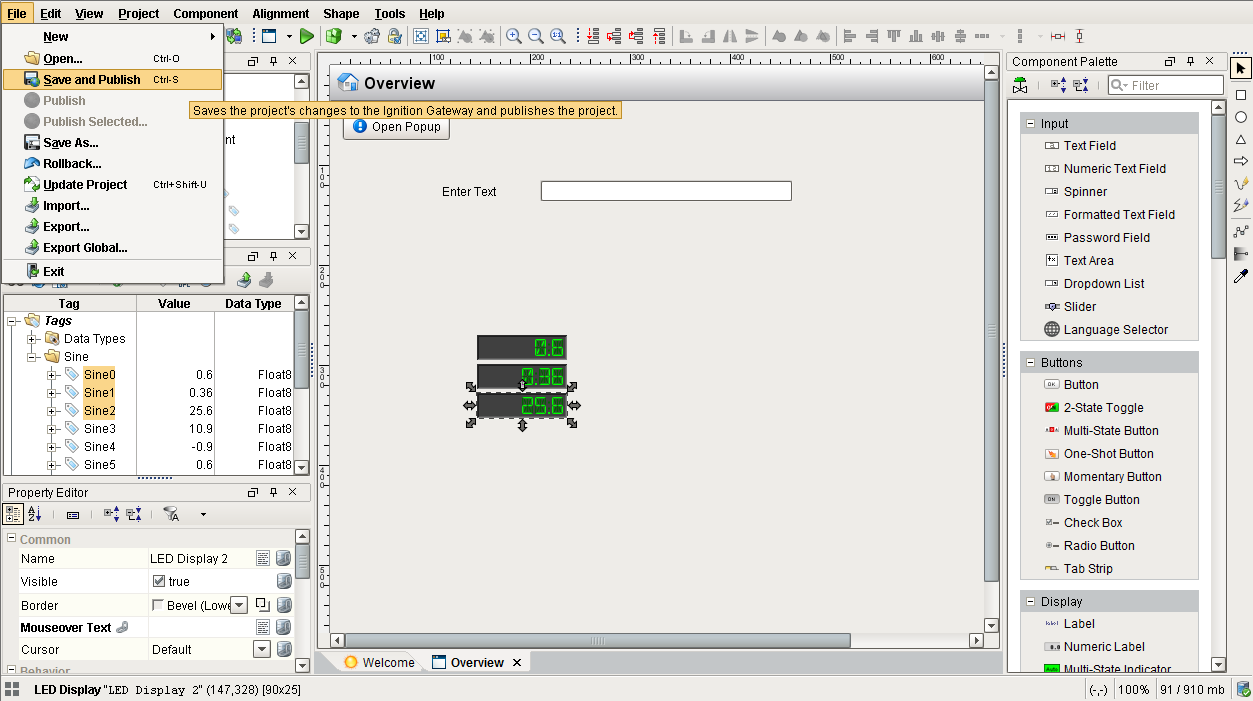
Now you can see live values on your window! Don't forget to save your project.
-
You can Preview your project in the Designer by clicking the Preview Mode button. This allows you to interact with your windows as if you were using a Client.
Learn more about Components and Property Bindings!
8. Launch Clients
Now that we've created a project, let's launch a Client to see it in action.
Launch a Client
-
If you haven't already, make sure you have a project created.
-
Go back to the Gateway Home page.
Your project will appear in the Launch Projects panel with a big Launch button to its right. Scroll down until you see it and Click on the Launch button to start up a Client.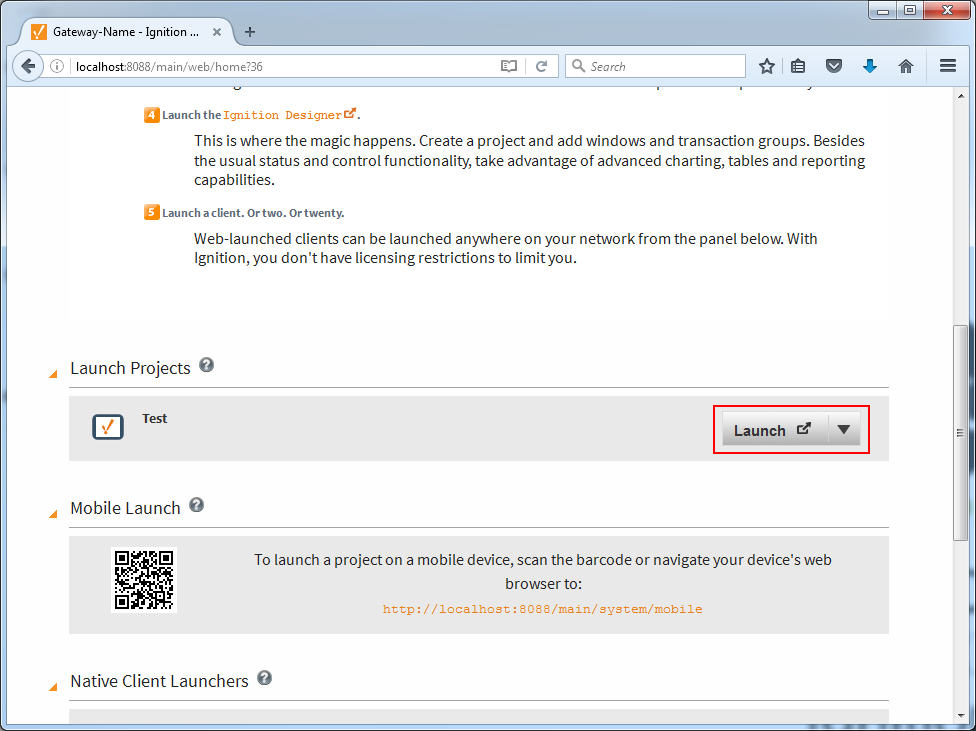
-
A loading screen will pop up briefly before the client opens.

-
Login to the Client using:
Username: admin
Password: password
By default, a new project uses the same user source as the Gateway, so the admin/password credentials will work.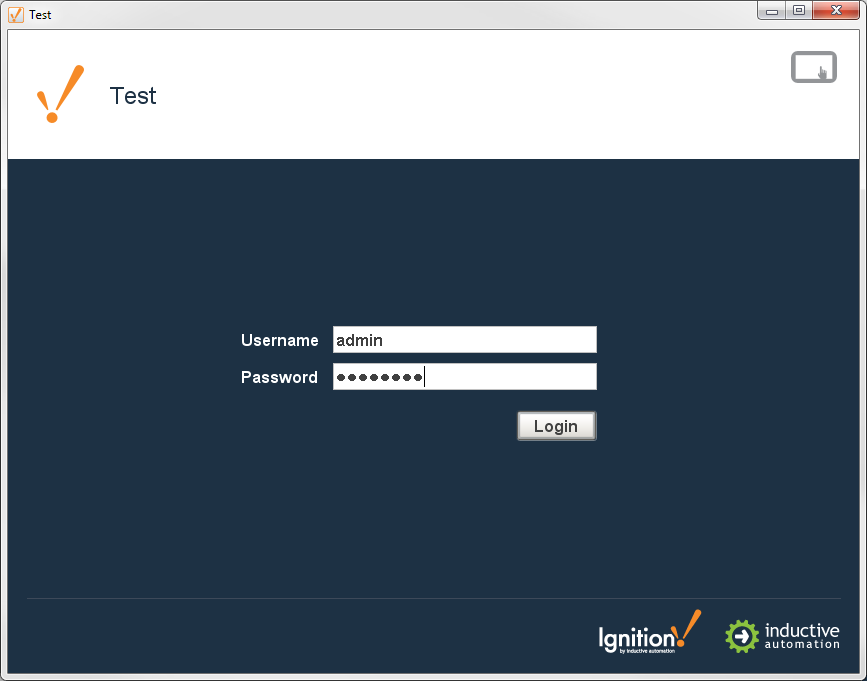
-
After you logged in, you can see your Client window displaying your project.
-
Go back into the Designer, make a change to the window, and click File > Save and Publish.
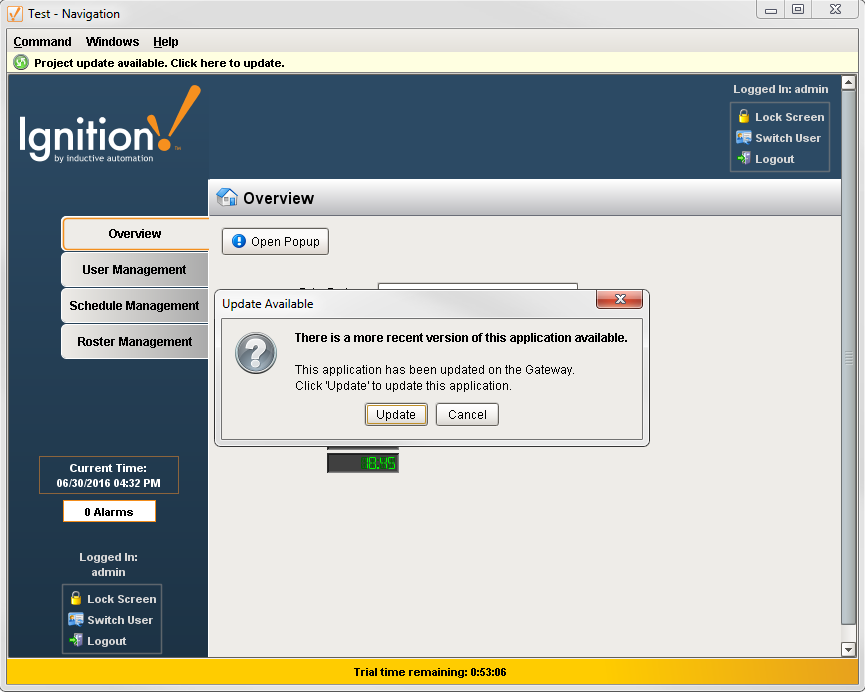
Your Client will show a notification saying that there are updates to the project.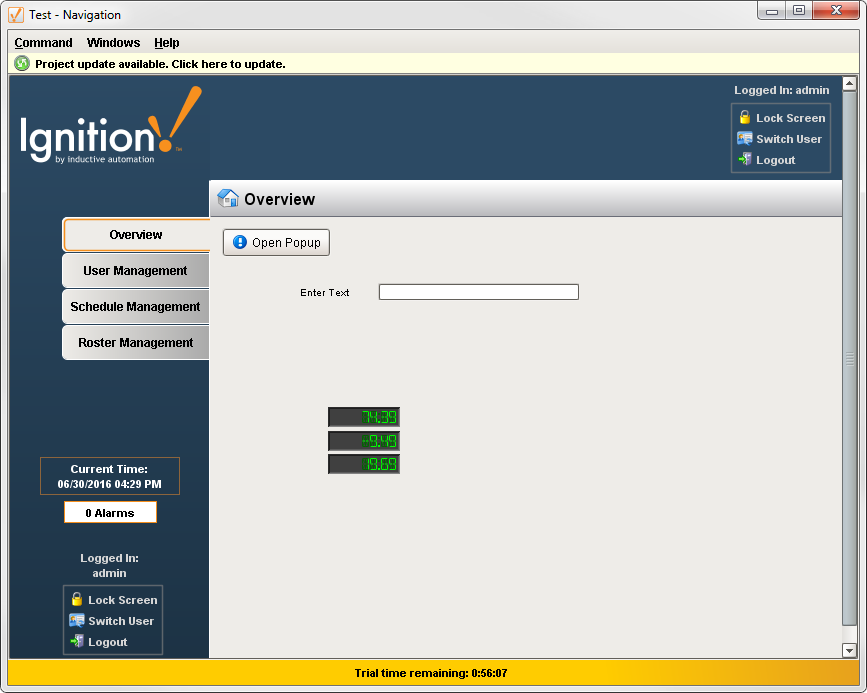
-
Click on the notification and then the Update button and the Client will update itself!
You can launch as many Clients as you want! If you've got other computers on the same network as the Gateway computer try launching on them too. Make sure that your Gateway computer doesn't have a Firewall enabled, or it is allowing traffic on port 8088 - the default port for the Ignition web server. The address to use on other computers is http://ipaddress:8088 where ipaddress is the IP address of the computer Ignition is installed on.
Learn more about Launching Clients!
9. Add History to Tags
Storing history for your Tags is simple, and once that's done we can display it on screen in a variety of ways. Let's add history to some of our Sine Tags.
Add History to your Tags
-
Go to the Designer, from Tag Browser, select one or more tags.
For example, select all the Sine tags in the Sine folder by holding the Ctrl key and clicking on several tags. -
Right-click on the selected tags, and then select Edit tag(s).
The Tag Editor window is displayed. Here, you can edit the tag and change the name, data type, scaling options, metadata, permissions, history, and alarming.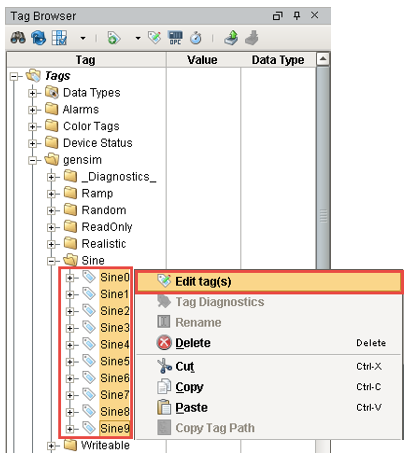
-
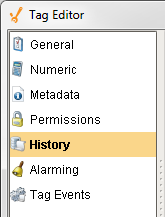
Click on History on the left side of Tag Editor.
-
Click Yes for the Store history for this tag field. This will enable all of the fields.
-
Choose a database from the History Provider dropdown.
For example, choose MySQL as the database you want to log to. -
Choose Default for Historical Scanclass.
This sets the rate at which data is logged. This Default is set to 1 second which means data is logged every second.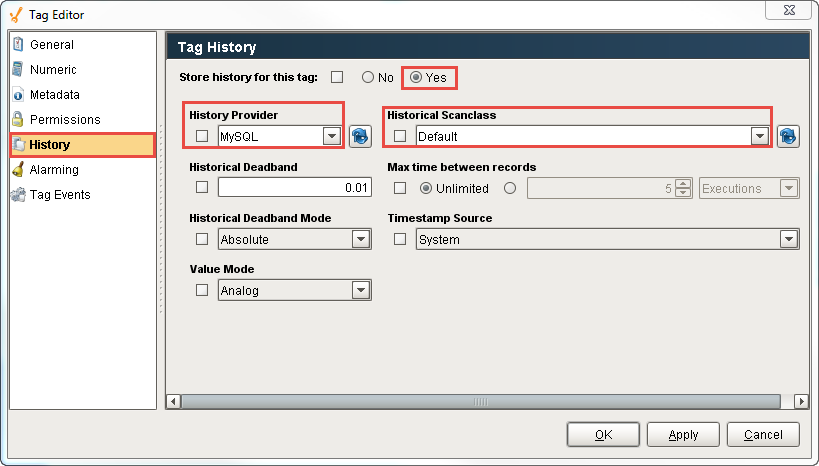
-
Click OK.
Now look in the Tag Browser, to the right of each Sine tag that is storing history, an icon appears letting you know it is setup.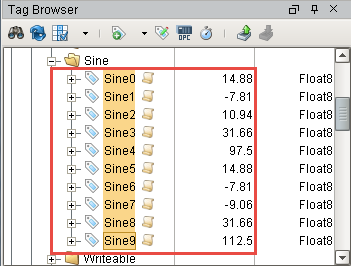
If you were to look in your database, you can see all the tables and data Ignition has created for you.
Learn more about Historian!
10. Create a Graph
You can see the Tag History data we just created by adding a graph to a window. Your graph can include subplots, axes, and a moving average pen. You can view the runtime data in realtime or historical mode.
Create a Graph
-
Open your Main Window. From the Charts section of the Component Palette, drag in the Easy Chart component.

We can add the tags to the graph the same way we created the status and control windows, that is, through drag and drop.
-
Drag all the Sine tags from Tags Browser to the graph.
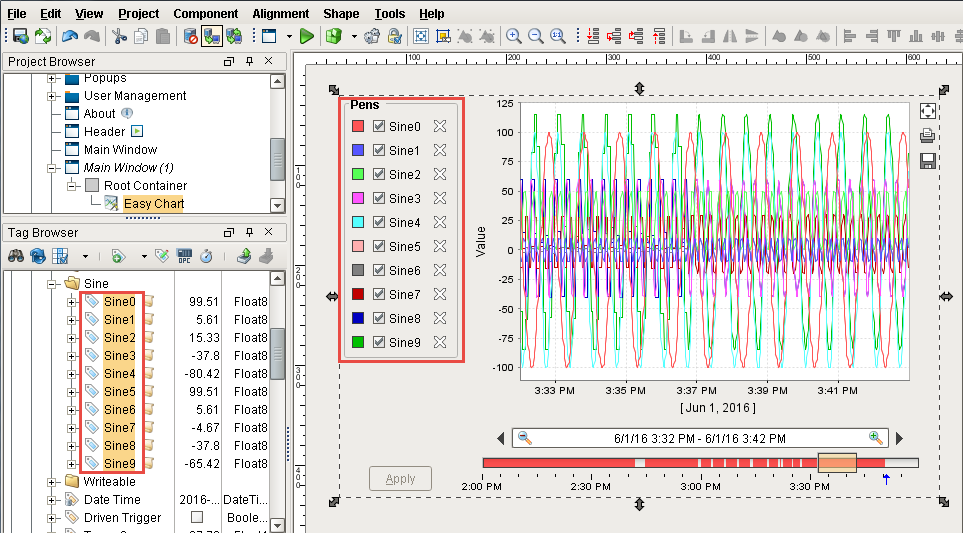
The tags are displayed on your Main Window but because you have just started logging data, not much data will show up.
-
To show more data, set the Chart Mode property of Easy Chart to Realtime.
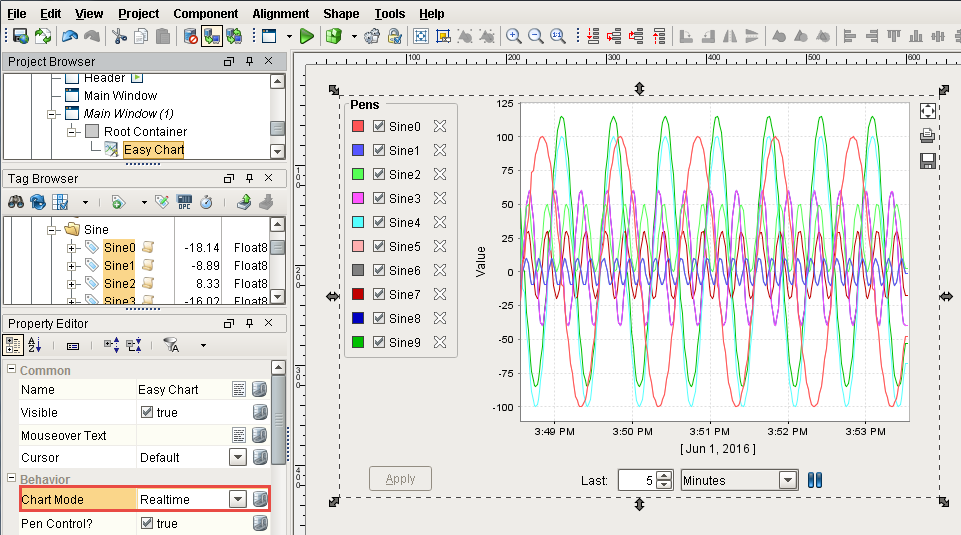
-
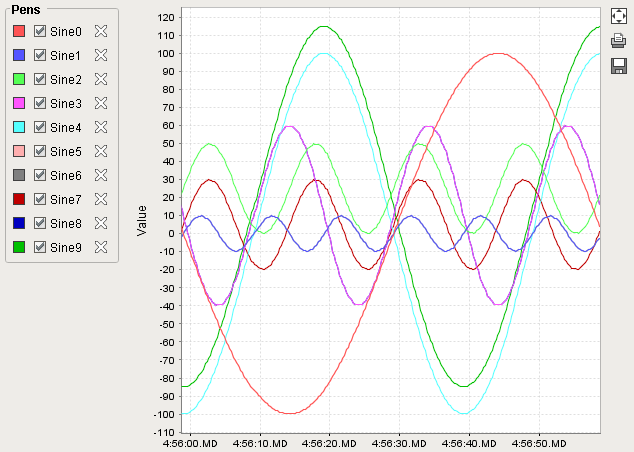
That's it! Now open your client and view your windows.
Learn more about Charts!
Similar Topics ...