Template Repeater Component
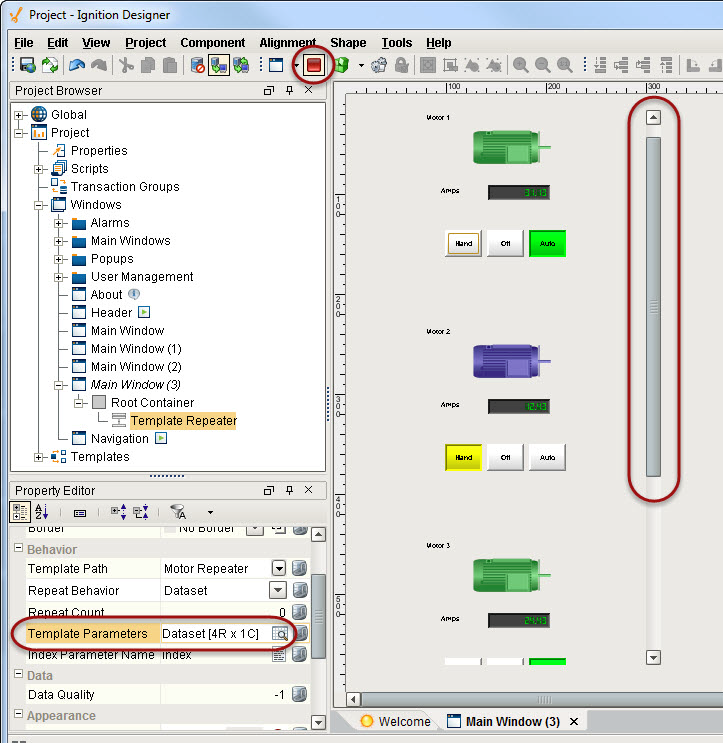
The Template Repeater component lets you easily create multiple instances of a master template for display on the HMI. Each instance shown in the Template Repeater has the same look, feel, and functionality of the master template. The instances can be arranged vertically, horizontally, or in a "flow" layout, which can either be top-to-bottom or left-to-right. If there are too many instances to fit, a scrollbar is added to the display.
To customize a template for use in a Template Repeater
By default, the Template Repeater uses integers to manage the templates it displays. The template intended for use inside the Template Repeater must therefore be configured so that it can accept these integers as pass-through parameters from the Template Repeater.
Let’s customize a template so we can use it with the Template Repeater.
-
In Project Browser, right-click Templates, select New Template to create a new template.
-
Right-click on the New Template, select Rename and change the name to Motor Repeater.
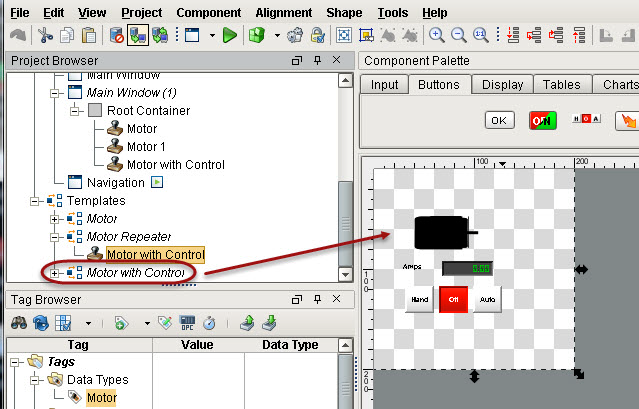
We have previously created a Motor with Control template that includes a Motor (from the Symbol Factory), an LED Display, and a Multi-State Button. -
Drag a Motor with Control template inside the new Motor Repeater template.
-
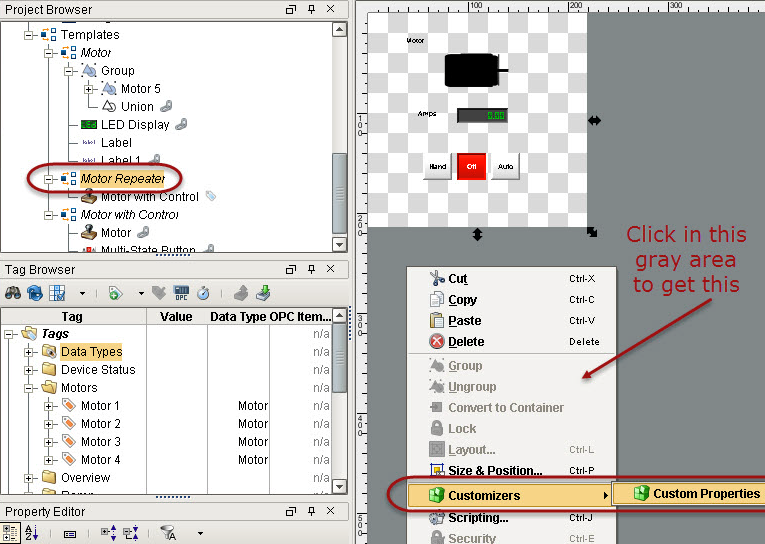
Select the Motor Repeater, right-click on the gray area of Motor Repeater, select Customizer > Custom Properties to create a new custom parameter.
-
In the Custom Properties window, click the green + icon for Template Parameters and type:
Name: MotorNumber
Type: Integer
MotorNumber is the custom property that is required by the Template Repeater component to create and manage all the template instances. -
Click OK.
-
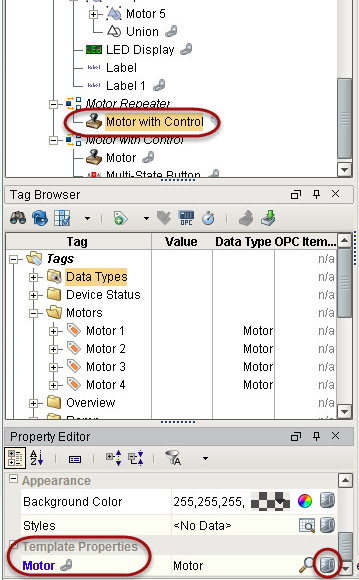
Select the nested Motor with Control template.
-
In the Property Editor, under Template Properties, select the binding icon for the Motor UDT.
-
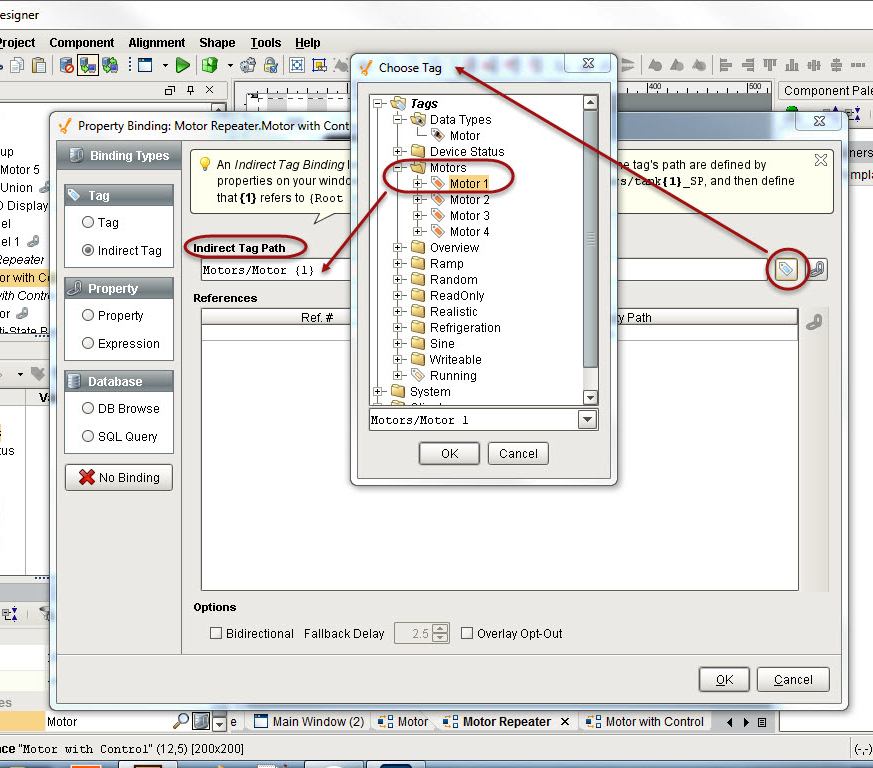
In the Property Binding window, click on the tag icon for the Indirect Tag Path, select Motor/Motor 1, and click OK.
-
Change Motor/Motor 1 to Motor/Motor {1}.
This indirectly binds the tag path to the address of the motor UDT with the indirection occurring on the number portion of the address.
-
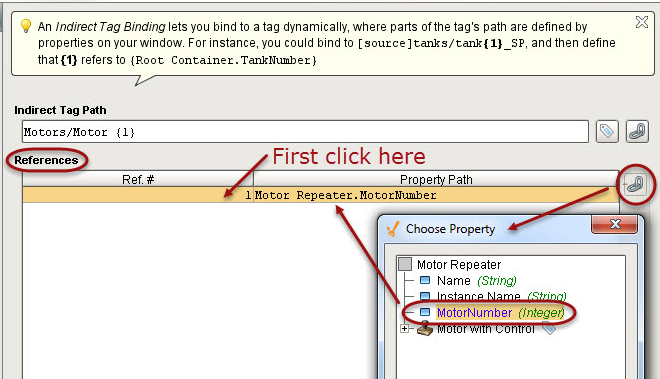
In the References section, click in the area under Ref.# and then click the binding icon, select the MotorNumber property, and click OK.
Now, when we pass a number into the Motor Repeater, the number will populate the nested template’s information.
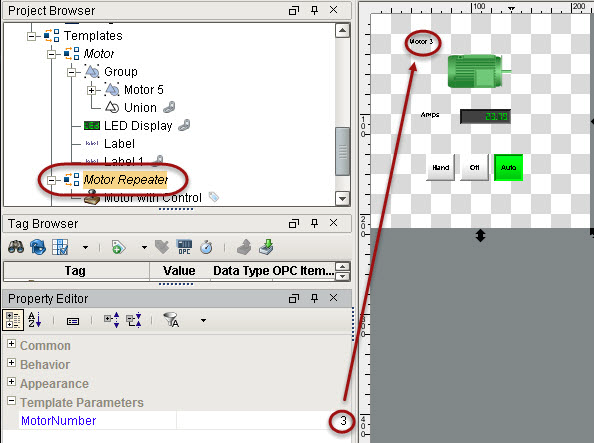
To test the new template, select the Motor Repeater template, change MotorNumber to a different number, and see the Motor number changes as well to the same number you specified.
That’s it! The Motor Repeater template is now configured to accept integers from the Template Repeater component.
To use a Template Repeater and fill it with a template
Let’s use the Template Repeater component from the Component Palette and fill it with our newly created Motor Repeater template.
-
Go to a Main Window, and from the Component Palette, drag the Template Repeater component into the window.
The Template Repeater displays as a small dashed box.
-
Resize it to at least twice the height and width of your Motor Repeater template.
-
While the Template Repeater is still selected, go to Property Editor.
-
Click the dropdown for Template Path and select the Motor Repeater template.
The dropdown menu shows all three templates we created earlier.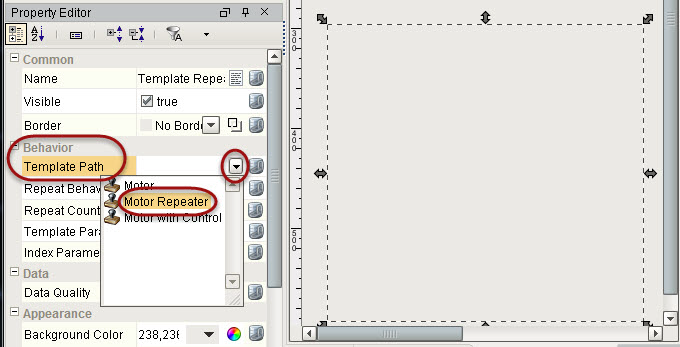
Below the Template Path property is the Repeat Behavior property which has a dropdown menu with two options, they are:
Count
Repeats the template a number of times, assigning each template an index number. The Count number starts at zero and increments upwards.Dataset
Repeats the template once per row in the Template Parameter dataset.
We will look at using both options. First, let’s use the Count option. -
Select Count from the dropdown menu of Repeat Behavior.
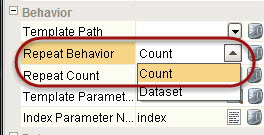
-
Set Repeat Count to the number of times you want the Template Repeater to repeat the template.
For example, here we set Repeat Count to 2, and so 2 templates are repeated in Template Repeater.
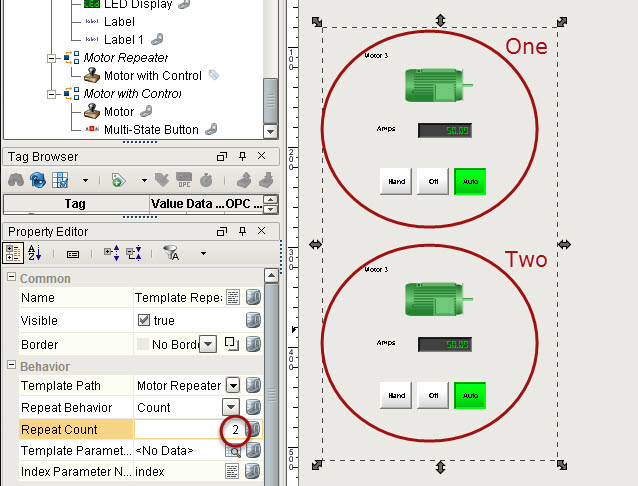
-
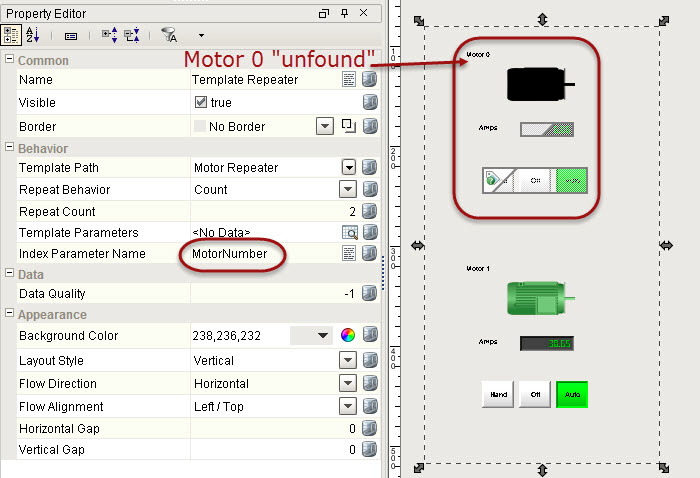
Change the index entry in Index Parameter Name to MotoNumber to apply the MotorNumber custom property to the Template Repeater.
The Template Repeater now fills with the motors starting with Motor 0. As there is no Motor 0, the Template Repeater displays the motor as “unfound” and is displayed in black.
Again, notice that the Count property begins its count at zero.
Now lets use the Dataset option. -
Select Dataset from the dropdown menu of the Repeat Behavior.
This allows the Template Repeater to index through a dataset.
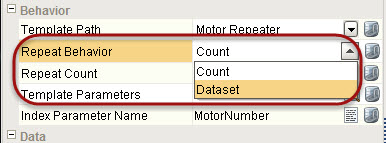
The Dataset option overcomes the “unfound” problem we had with the Count option and offers a lot of flexibility in how the motors are created and displayed in Template Repeater. -
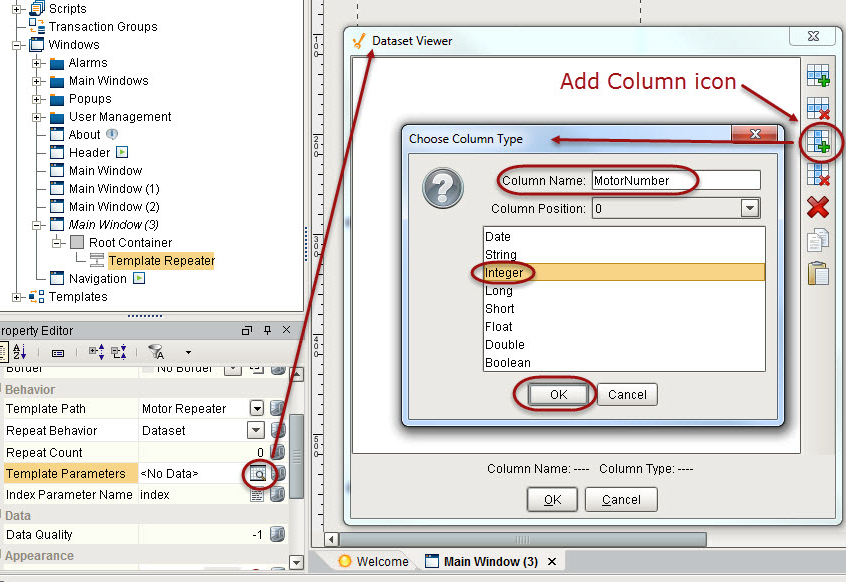
Click on the Dataset Viewer icon for Template Parameters.
-
In the Dataset Viewer window, click the Add Column icon, type MotorNumber as the Column Name and select Integer as the column type, then click OK.
Now we have a one column dataset with a header name that is the same as the Custom property on the Template Repeater.
-
Click the Add Row icon four times to get four rows, and change the row numbers from 0 to 1-4 to display Motors 1-4, and click OK.
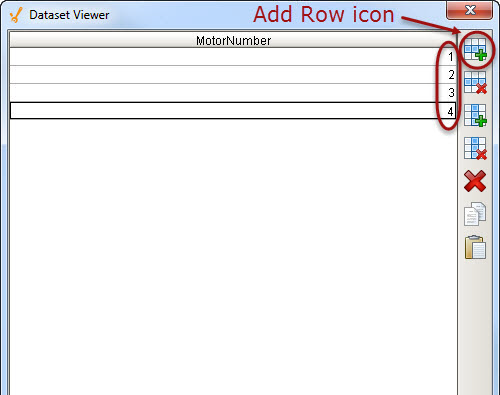
The Template Repeater component now fills with the motors as you specified them. In this case, they are displayed as One column of 1-4.
-
Go to Preview Mode and notice that the Scroll bar allows for you to view all the Motors.
